Chocolate Marbled Banana Bread
March 12, 2014
January and New Years Resolutions always make me think about how I could be a little bit healthier, or eat fewer desserts (yeah right!) Of course we always receive a ton of chocolate and sweets over the holidays, so Jason and I both justify eating them to “get them out of the house!” Now, I know it is March but since all the chocolate is gone, I had to find a way to satisfy my cravings. So, when I found this marbled banana bread recipe on the Food Network under “Healthy Dessert Recipes” I figured it was worth a shot. The recipe looks more complicated than it really is, so don’t be afraid of it, it really isn’t that hard to put together.
Chocolate Marbled Banana Bread
Ingredients
3/4 c all-purpose flour, plus extra for dusting the pan
2 oz bittersweet chocolate, chopped
2 medium very ripe bananas
2/3 c sugar
1/4 c canola oil
2 large eggs
3/4 c while wheat flour
1 1/2 tsp baking powder
1/2 tsp baking soda
1/2 tsp salt
1/2 c buttermilk
1 tsp vanilla extract
1. Preheat the oven to 350°F. Spray a 9 by 5 inch metal loaf pan with nonstick cooking spray and dust well with all purpose flour to cover the pan completely. Tap out any extra flour. (The flour really helps the bread slide out of the pan easily when it’s done baking!)
2. Melt the chocolate in a microwave-safe bowl on high in 30 second intervals until melted and smooth. (About 1 minute to 1 minute 30 seconds) Set aside.
3. Mash the bananas until mostly smooth, then mix in sugar. Using a rubber spatula or wooden spoon, add in oil and eggs, stir until combined. Mix in both flours, baking soda, baking powder and salt. Then stir in vanilla and buttermilk.
4. Stir 1 cup of the batter into the melted chocolate.
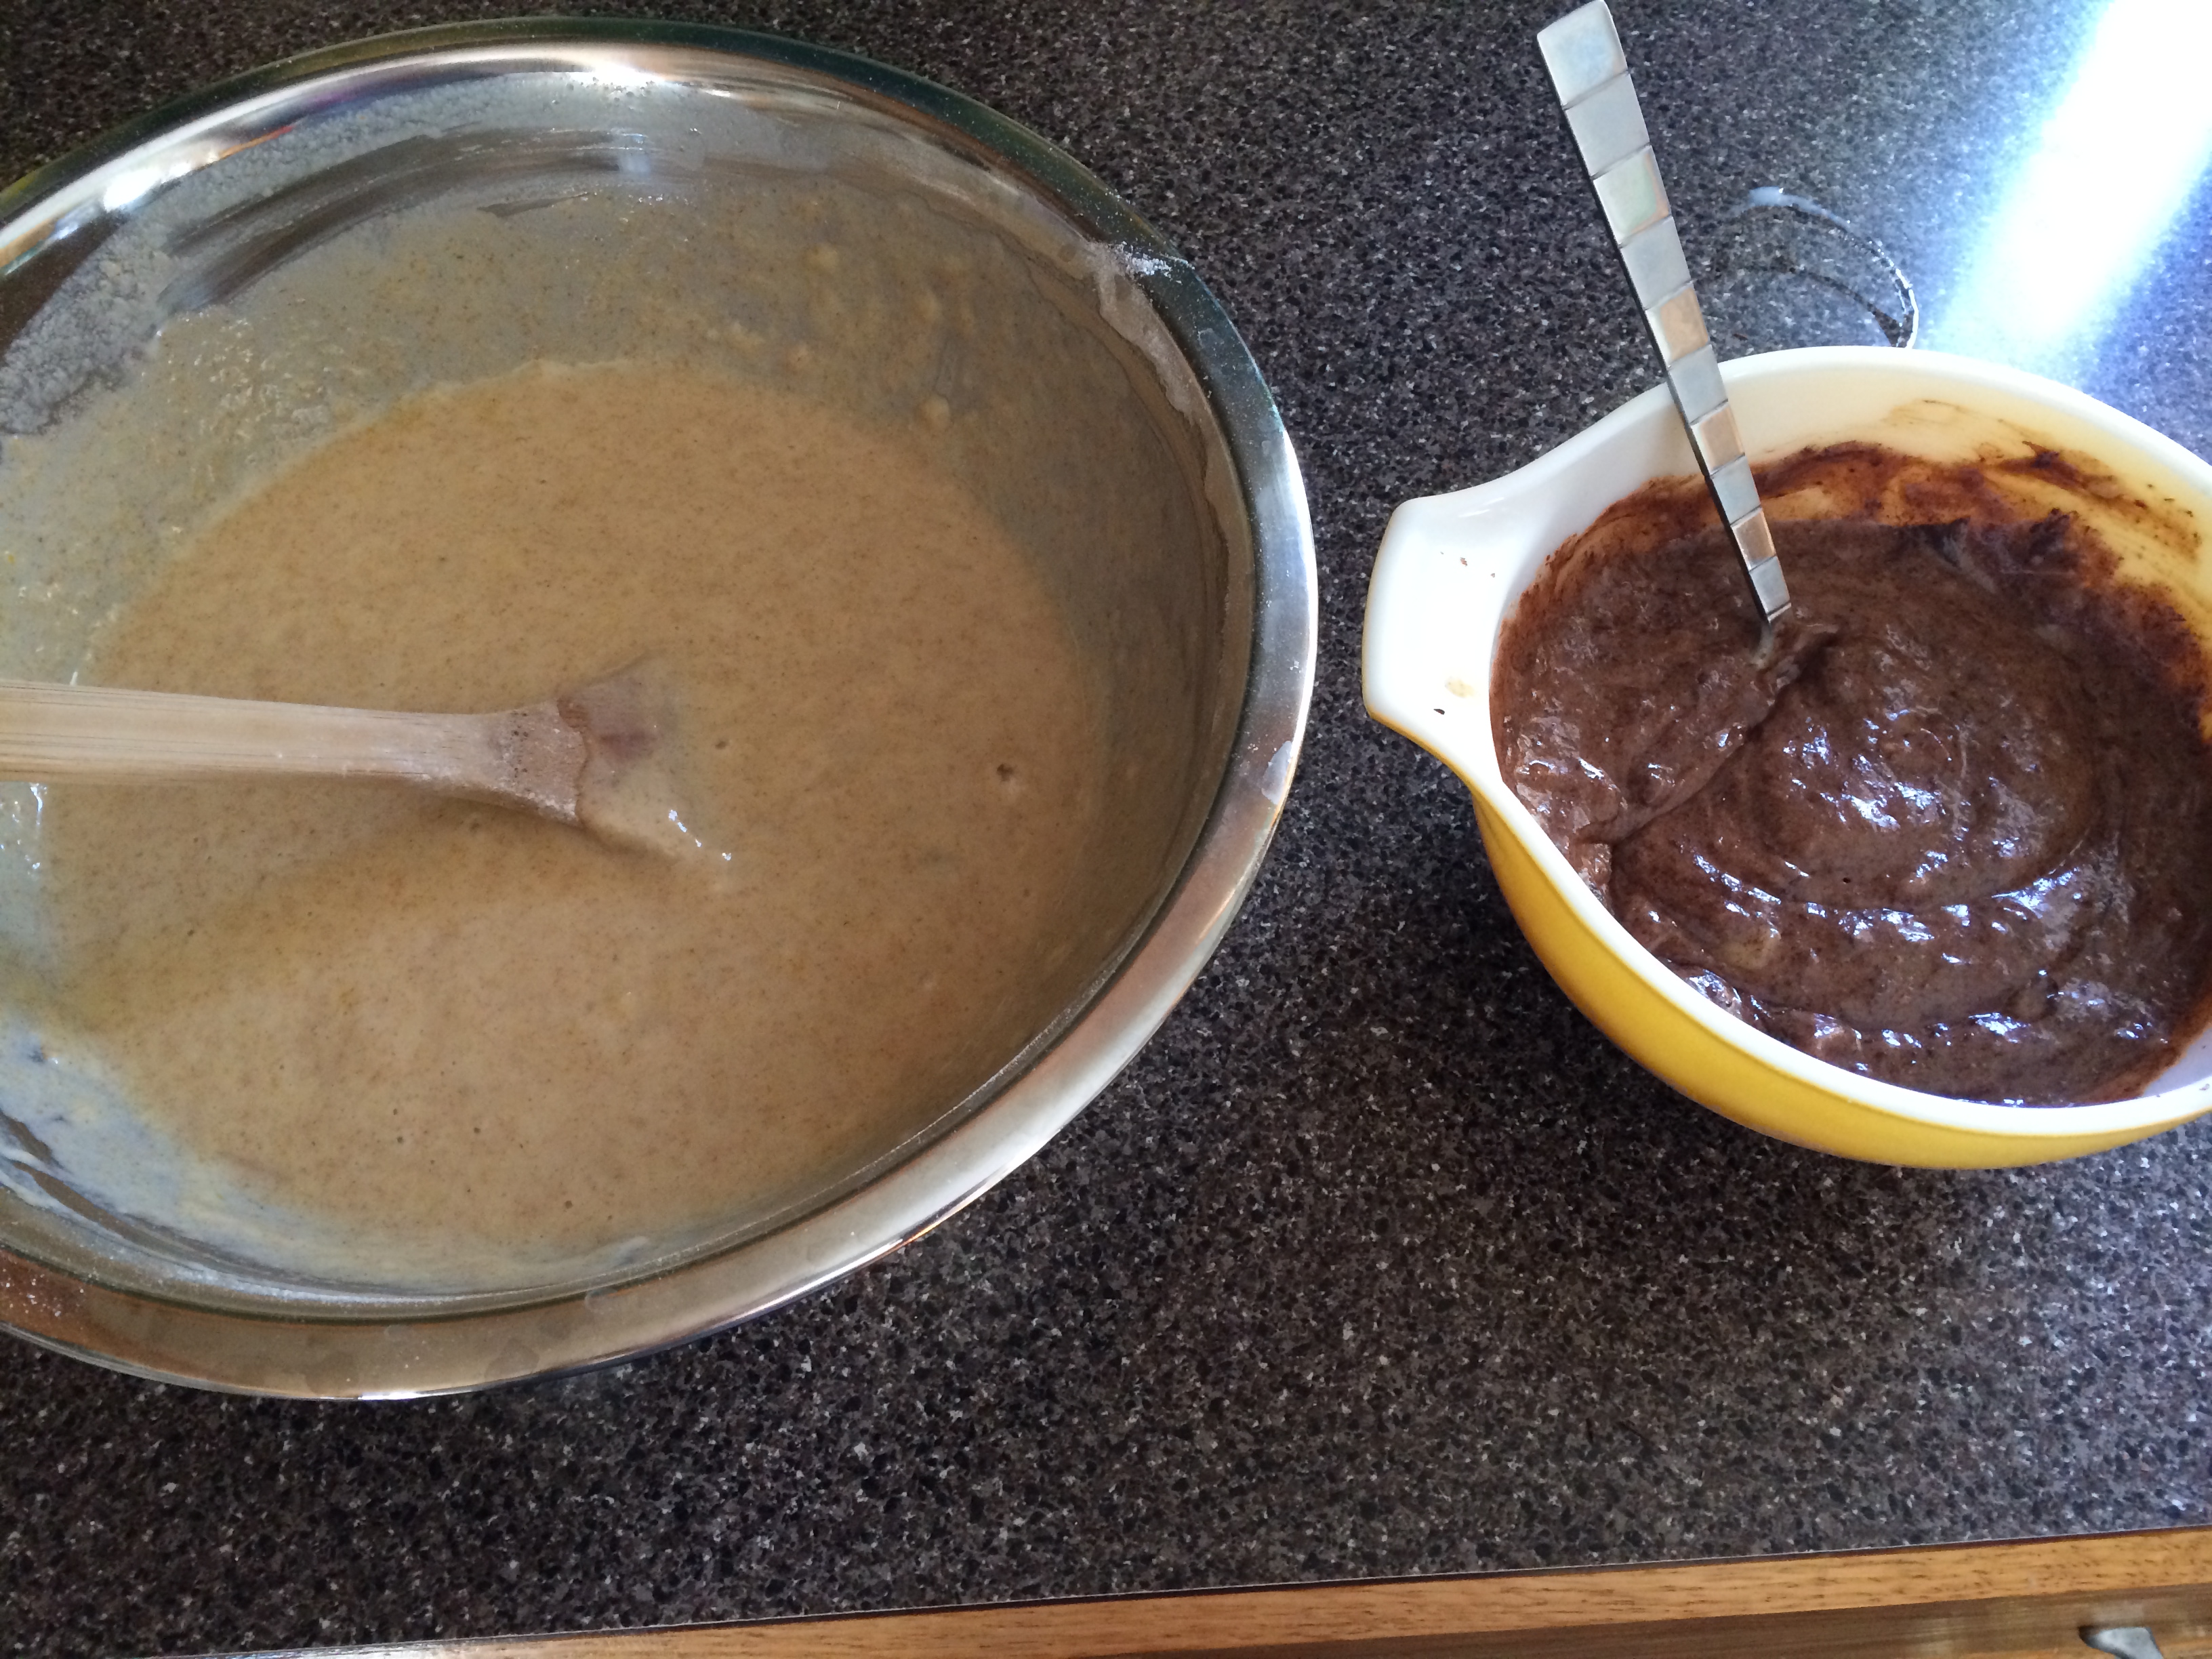
Banana Batter and Chocolate Banana Batter
5. Fill the loaf pan with half of the banana batter, then half of the chocolate batter. Repeat the layers with the other half, then using a knife or spoon, gently swirl the layers together.
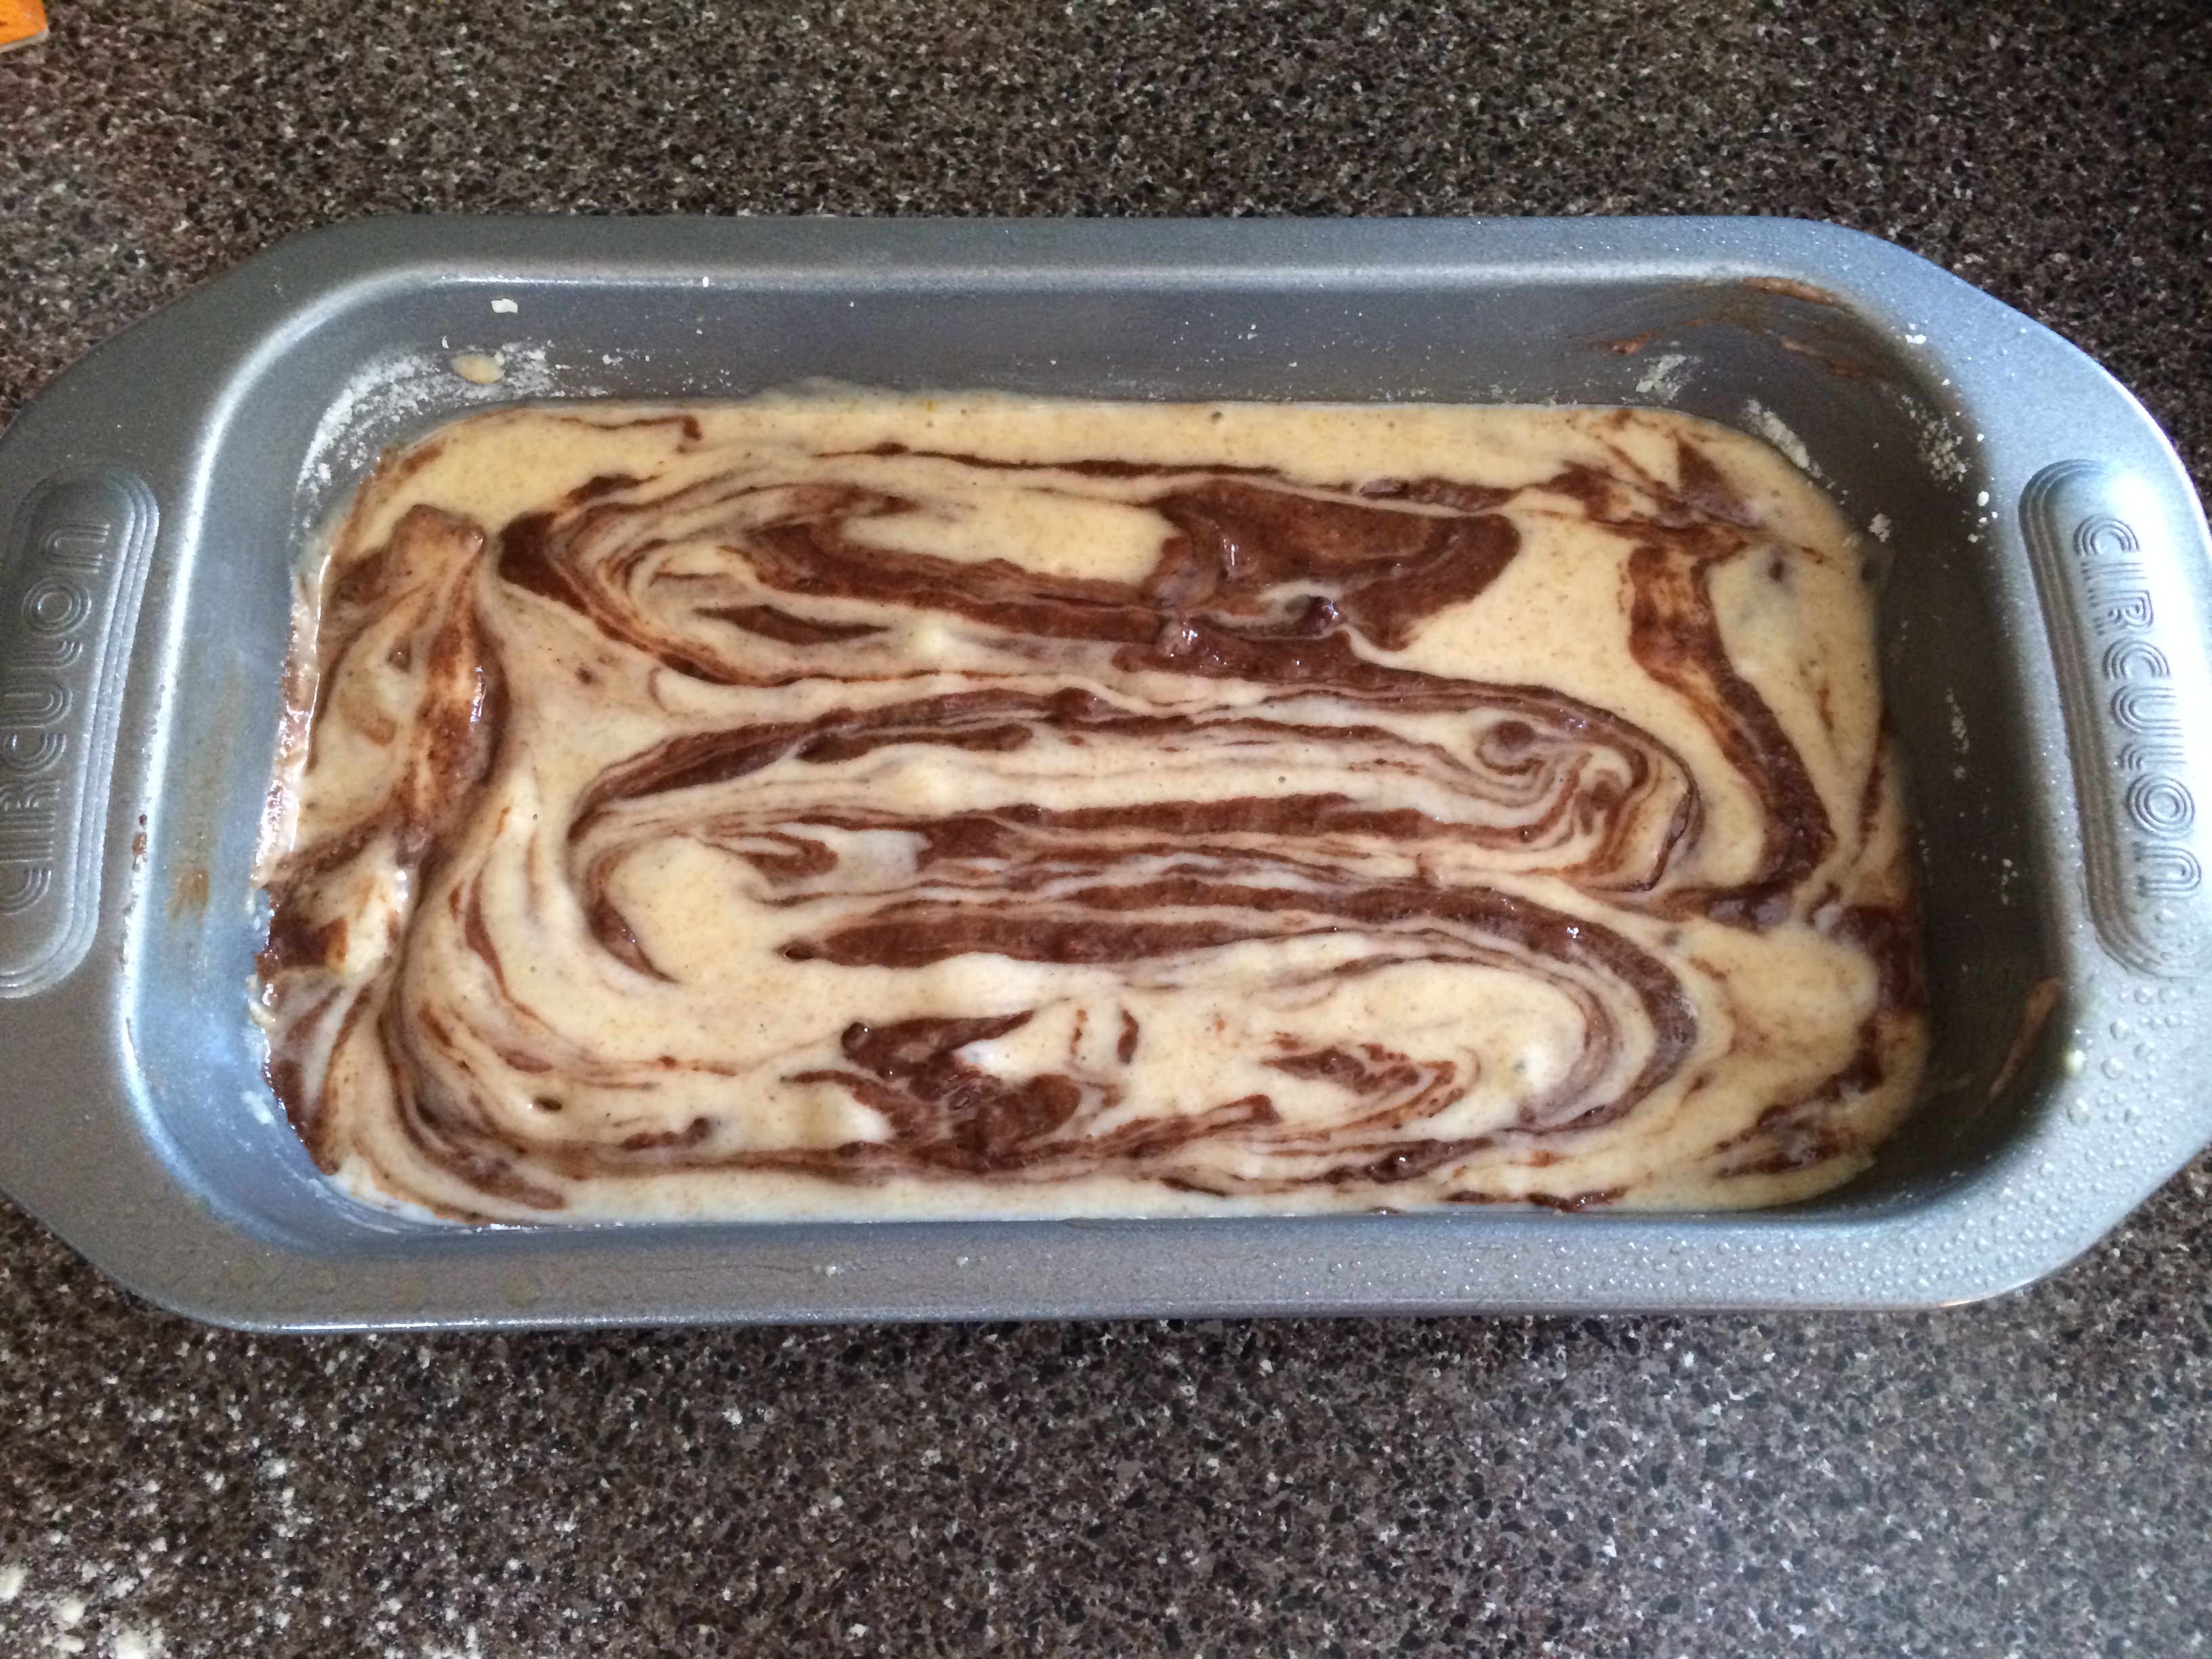
“Marbling” the Banana Bread
6. Bake about 45 minutes until golden brown on top and toothpick inserted into the center comes out clean.
7. Cool for 15 minutes in the pan, then transfer to a wire rack to cool.
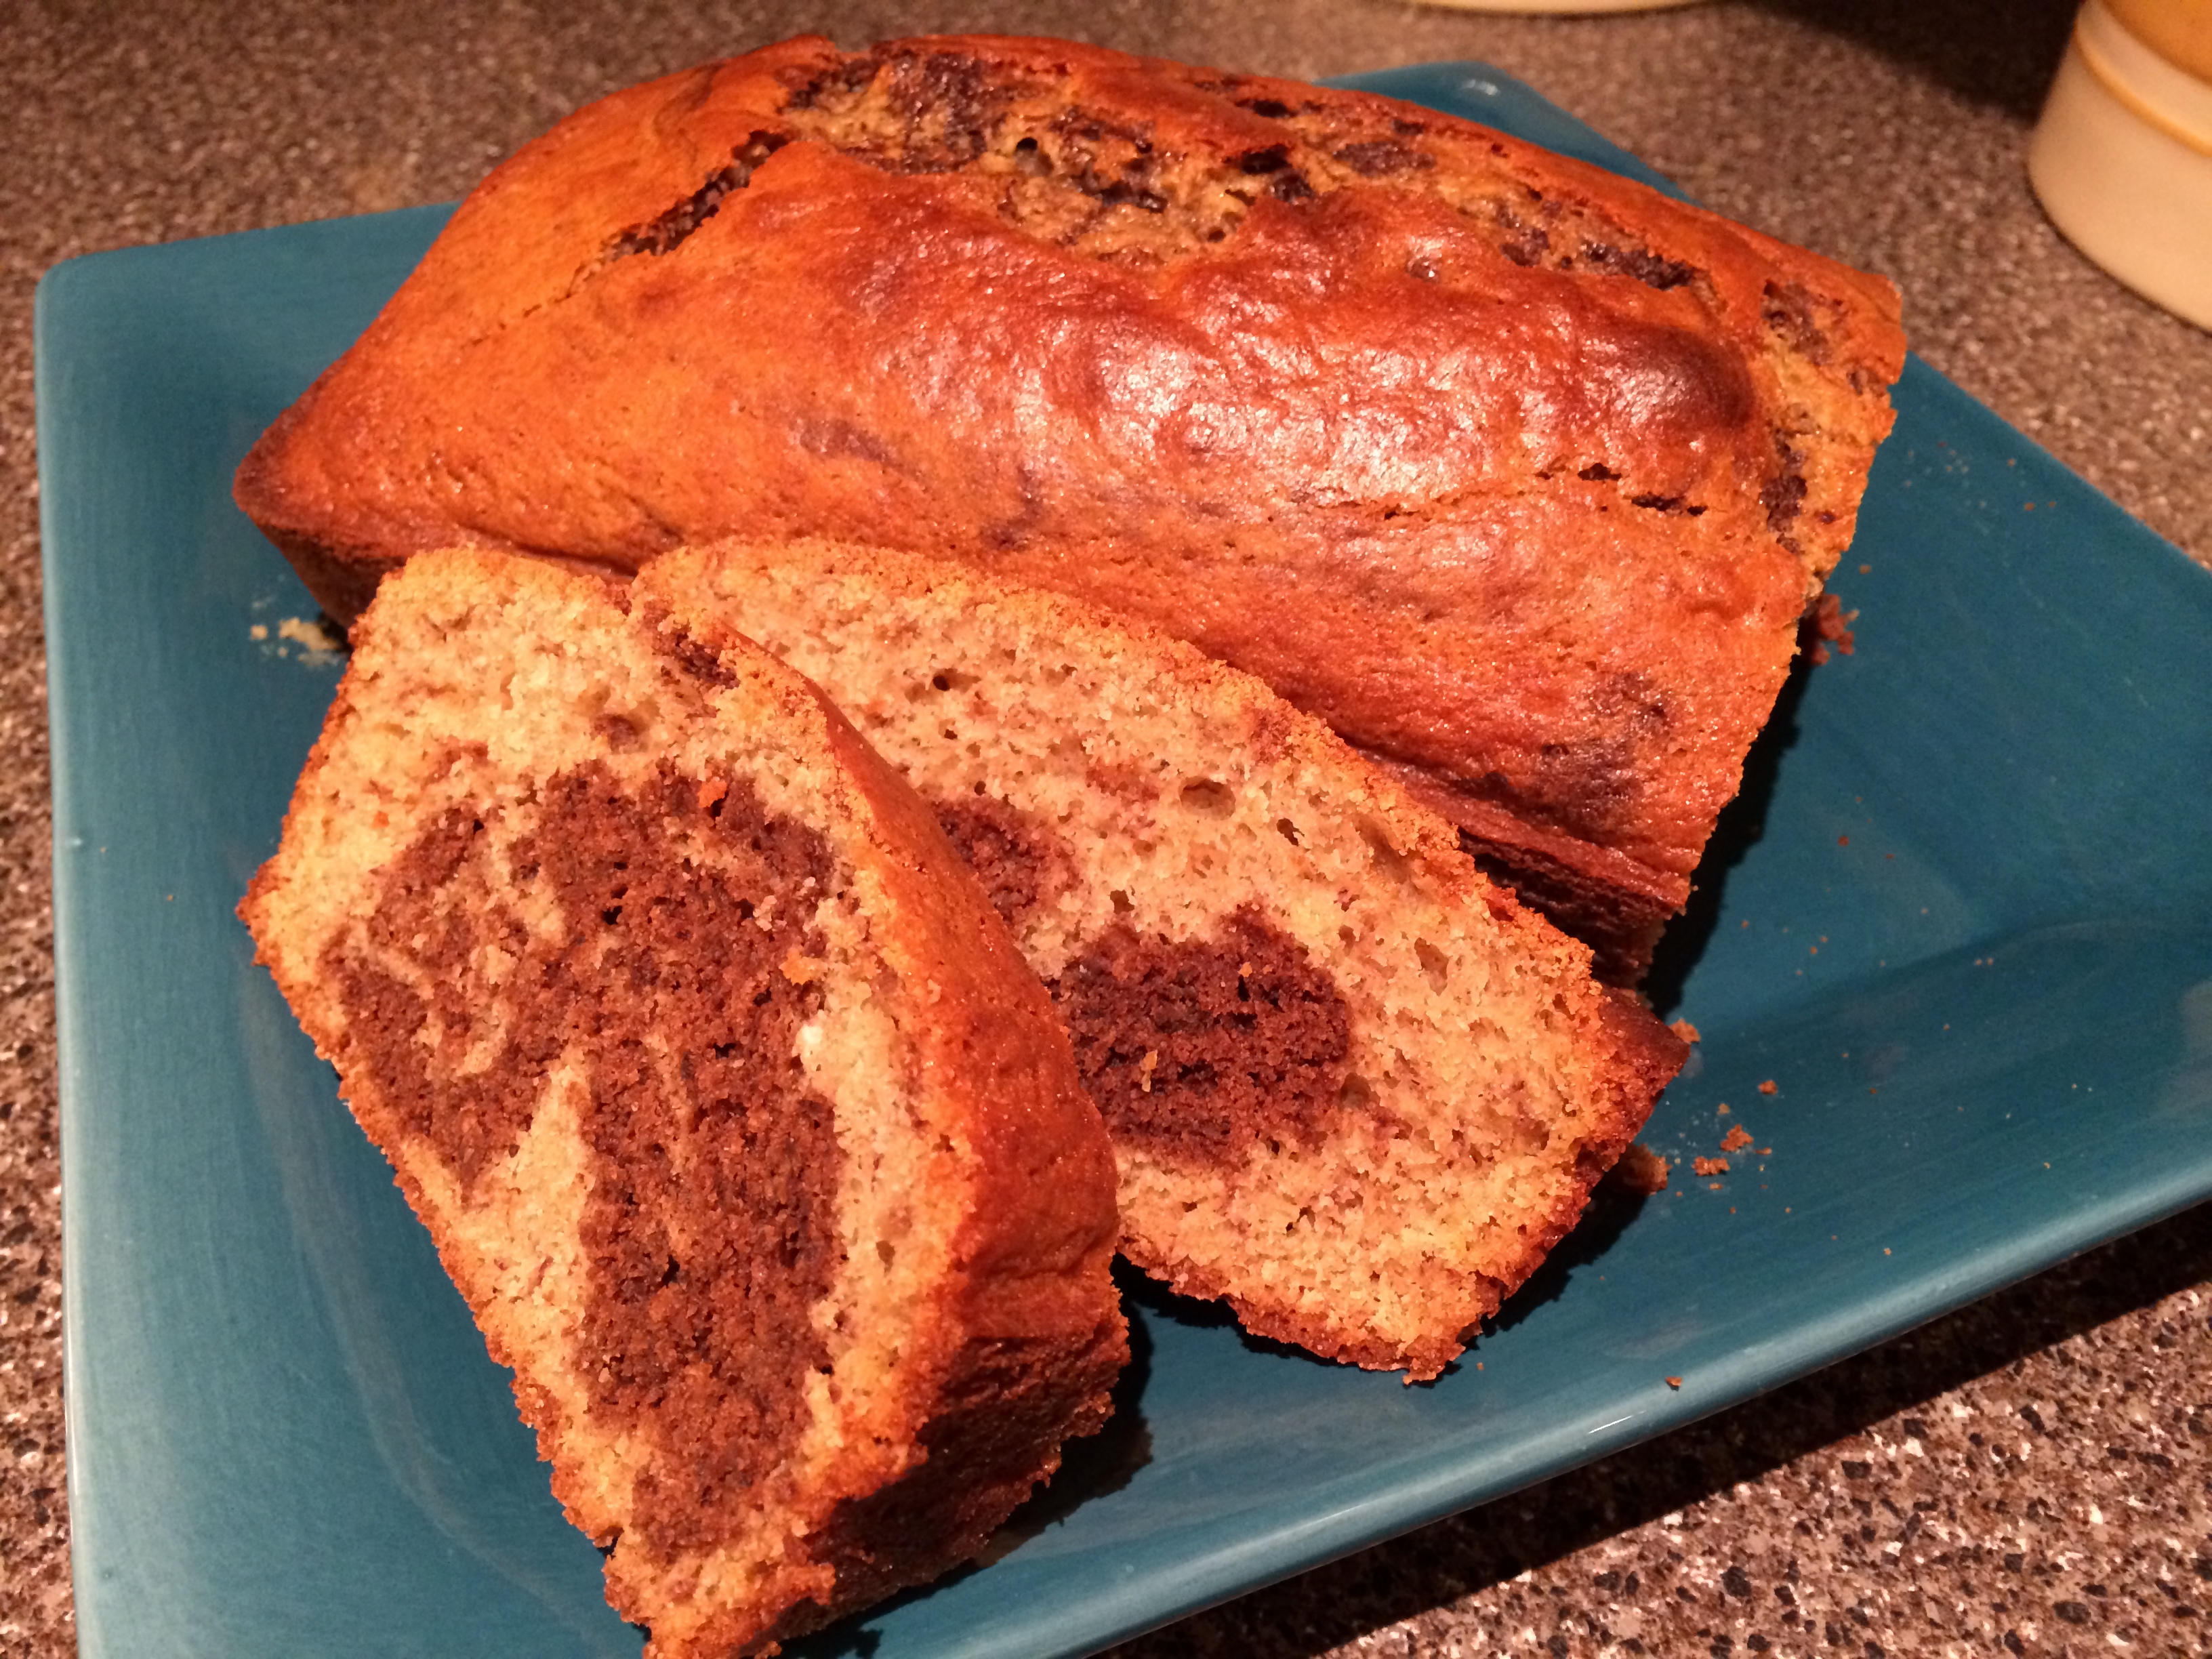
Finished! Chocolate Marbled Banana Bread
I needed about 10 extra minutes until the banana bread was done (I love using the toothpick test to help tell me how done the bread is!) and lucky for me the top did not get too brown. If the top of your bread starts to get too brown and the bread is not done baking yet, you can always tent the banana bread with some tin foil. This will help keep the top from burning but the bread will still bake. The bread was not that dry at all, and the chocolate was not overpowering either! There was a nice balance between the banana flavor and the chocolate flavor. Let’s just say the banana bread did not last very long in our house. Do you have any other healthy dessert recipes that you bake often? We’d love to hear them!
How I Met Your Mother “Sumbitch” Cookies
December 5, 2013
Yesterday we got our first snowstorm of the season. I love snow, don’t get me wrong, but I really dislike the traffic that happens when it snows. Lucky for me, I was fortunate enough to work from home while we got about 6″ of snow dumped on us. I loved watching the big fluffy snowflakes fall from the sky, and how pretty all the trees looked with the blanket of fresh snow. I felt so cozy at home that I got this urge to bake cookies, no complaints from Jason of course.
Normally I have my go-to recipe when I want cookies (oatmeal chocolate chip), but I had been holding onto a recipe we had heard about from an episode of How I Met Your Mother. Jason watches the show pretty regularly, and I just happened to be watching an episode with him, the one when “The Mother” meets Lily on the Train and uses her “sumbitch” cookies to help calm her down. They sounded so good! Who could resist, chocolate, peanut butter and caramel?
Here’s the recipe I used:
How I Met Your Mother “Sumbitch” Cookies
1 c butter softened
1 c granulated sugar
1 c packed brown sugar
1 c creamy peanut butter
2 eggs
1 tsp vanilla extract
2 c all-purpose flour
1 tsp baking soda
1/2 tsp salt
bite size chocolate covered caramel candy (I used Hershey’s Kisses with caramel)
1. Beat butter, sugars and peanut butter until smooth. Add eggs and vanilla, beat until blended
2. Stir together flour, baking soda and salt in a small bowl. Add to the butter mixture, beat until blended. Cover and chill for at least 30 minutes
3. Preheat over to 350°F. Shape 2 Tbs of dough around each unwrapped candy. It helps to use lightly floured hands to keep the dough from sticking. Place on an ungreased or parchment paper-lined baking sheet.
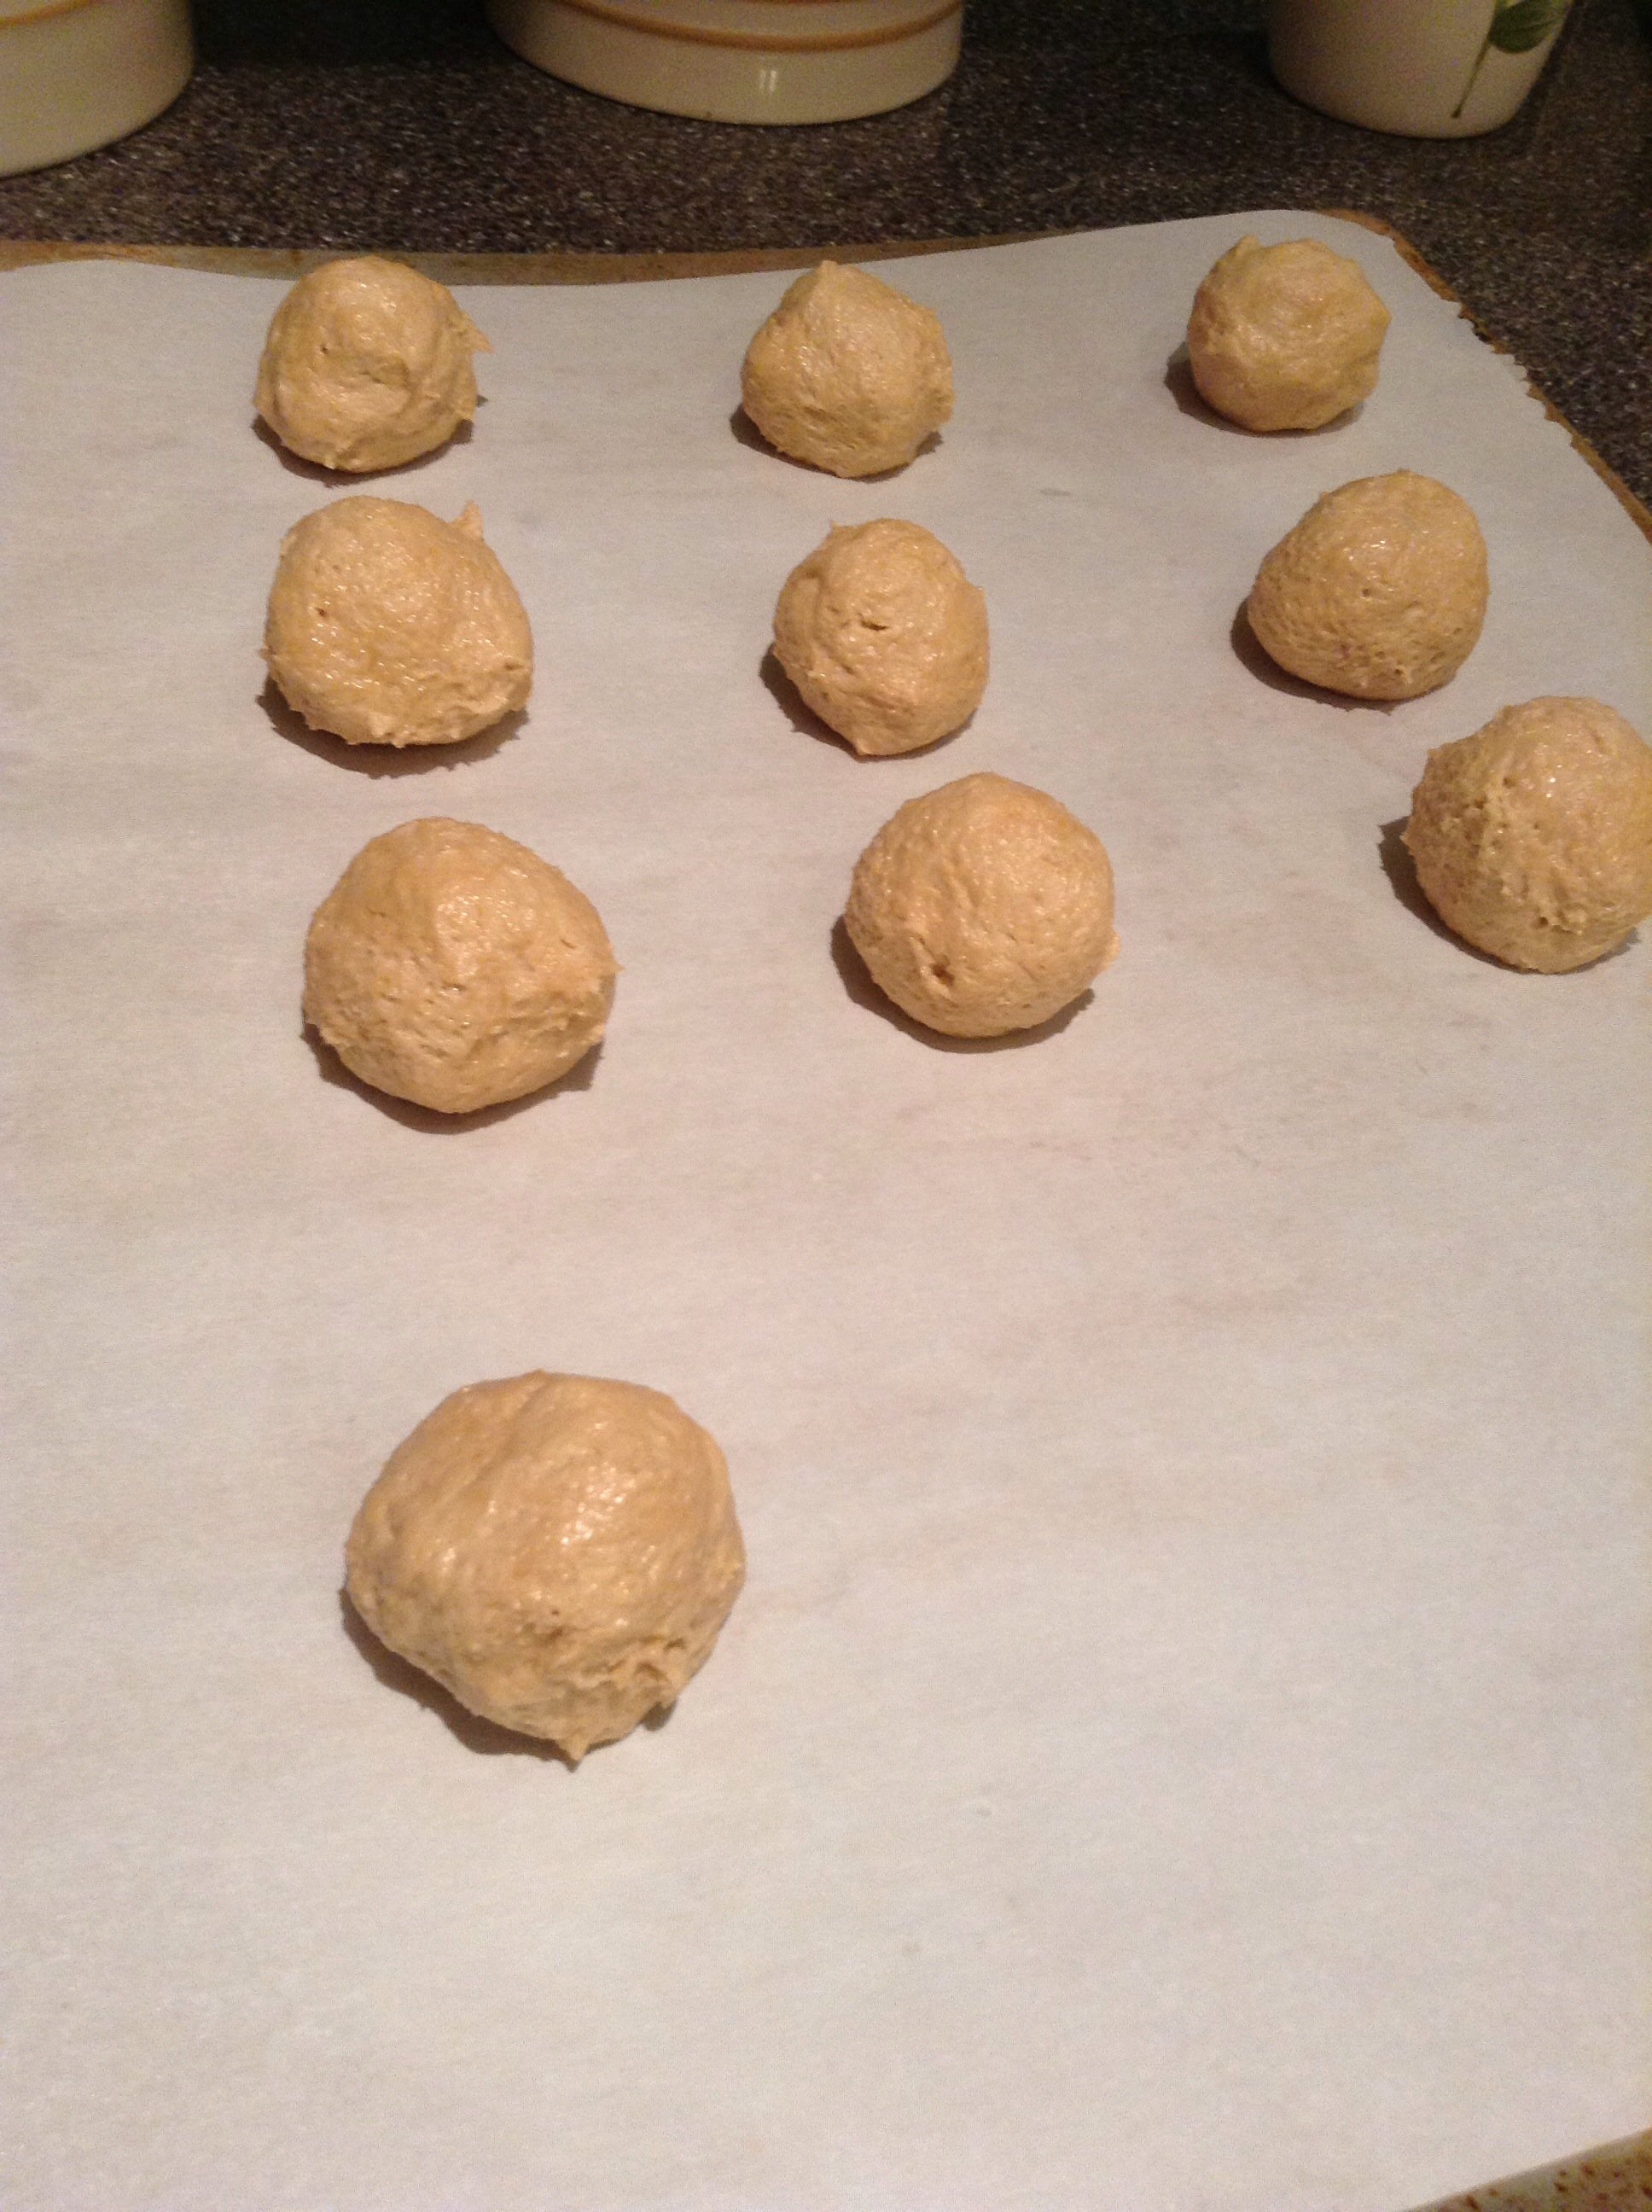
Cookie dough around the Hershey Kisses
4. Bake for 13-14 minutes or until lightly browned. Cool on baking sheet for 5-10 minutes before transferring to a wire rack. (Cooling for extra time on the sheet is very important! The candy is still really soft/melted so if you pick up the cookies too early, the whole thing will fall apart.)
Yields: about 4 dozen
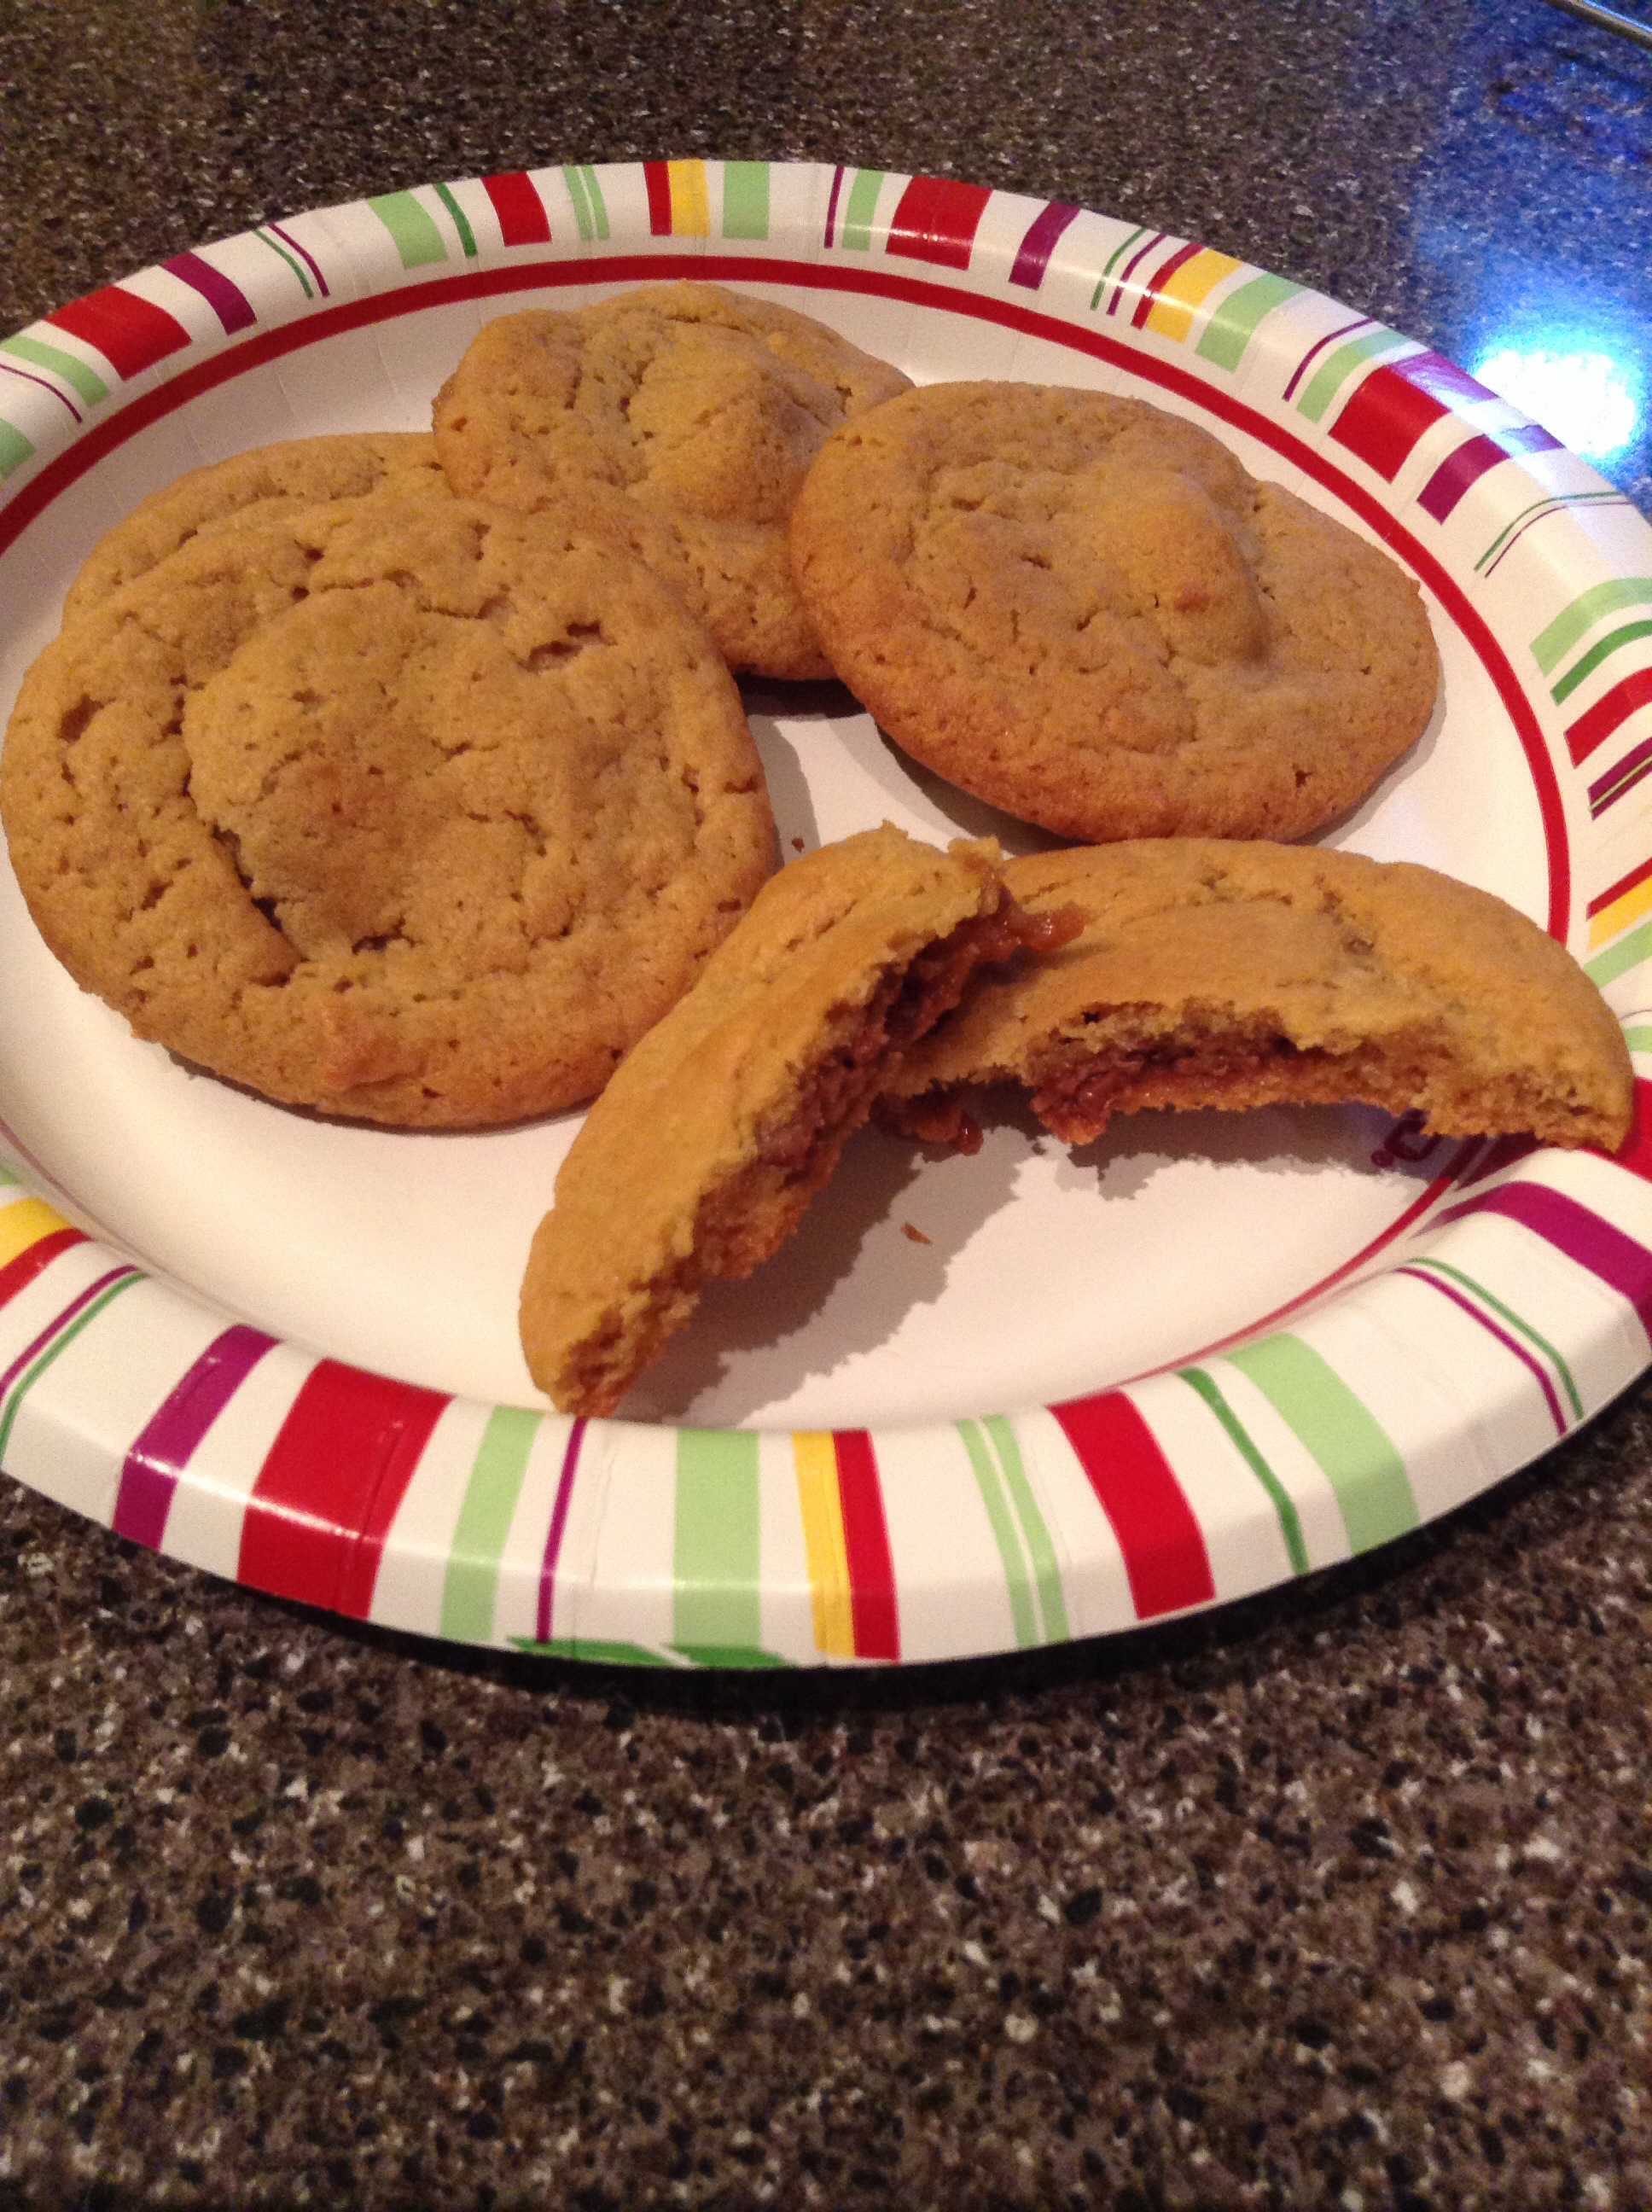
The finished HIMYM “Sumbitches!”
The cookies did not disappoint! I loved the combination of peanut butter and chocolate and to throw the caramel in there too added another yummy flavor. The cookies were chewy (my favorite) and the caramel stayed pretty soft too. I was worried about it hardening, but it didn’t at all. The kisses melted into the dough really well too, but did not spread all the way though the cookie. The stayed close to the center, so don’t be surprised if that happens to you too. Jason took a few into work for taste testing, and everyone loved them! Now I’m really craving a “sumbitch” and of course they’re all on the counter at home.
No-Bake S’mores
September 19, 2013
We went camping a couple of weekends ago at Mille Lacs State Park to check camping off my list of “Things to Do in Summer 2013.” It wasn’t my first time camping, but my first time really using my new backpack. We had a 3/4 mile hike out to our campsite on a small lake, beautiful, quiet and not too far for my first time backpacking. I loved it! Packing everything in the pack was a struggle for me trying to fit everything, (note to self, I need a better sleeping bag! One that is meant for backpacking.) but we planned ahead with clothes and meals so we had the right amount of food and all our supplies fit just perfectly. Maggie came along too and got to experience her first weekend camping. Being a beagle, she LOVED all the new smells and that we went on lots of long “walks.”

Big smile from Maggie on our hike
I insisted that we bring stuff to make s’mores, even though we were trying to save room in our packs. I love roasting marshmallows over the campfire, trying to get them perfectly toasted. I end up burning the marshmallow most of the time though. Plus, s’mores have chocolate so they’re an automatic delicious treat in my book!
Since we don’t have a fire pit to roast s’mores at home, Jason found a recipe to satisfy my s’mores craving…no bake s’mores! Making these were so easy and quick; it took about 30 minutes total, including the time the s’mores spent in the freezer. Here’s what you’ll need:
Graham crackers
Marshmallow fluff/creme
Chocolate to melt
Sprinkles or chopped nuts to add as a topping (optional)
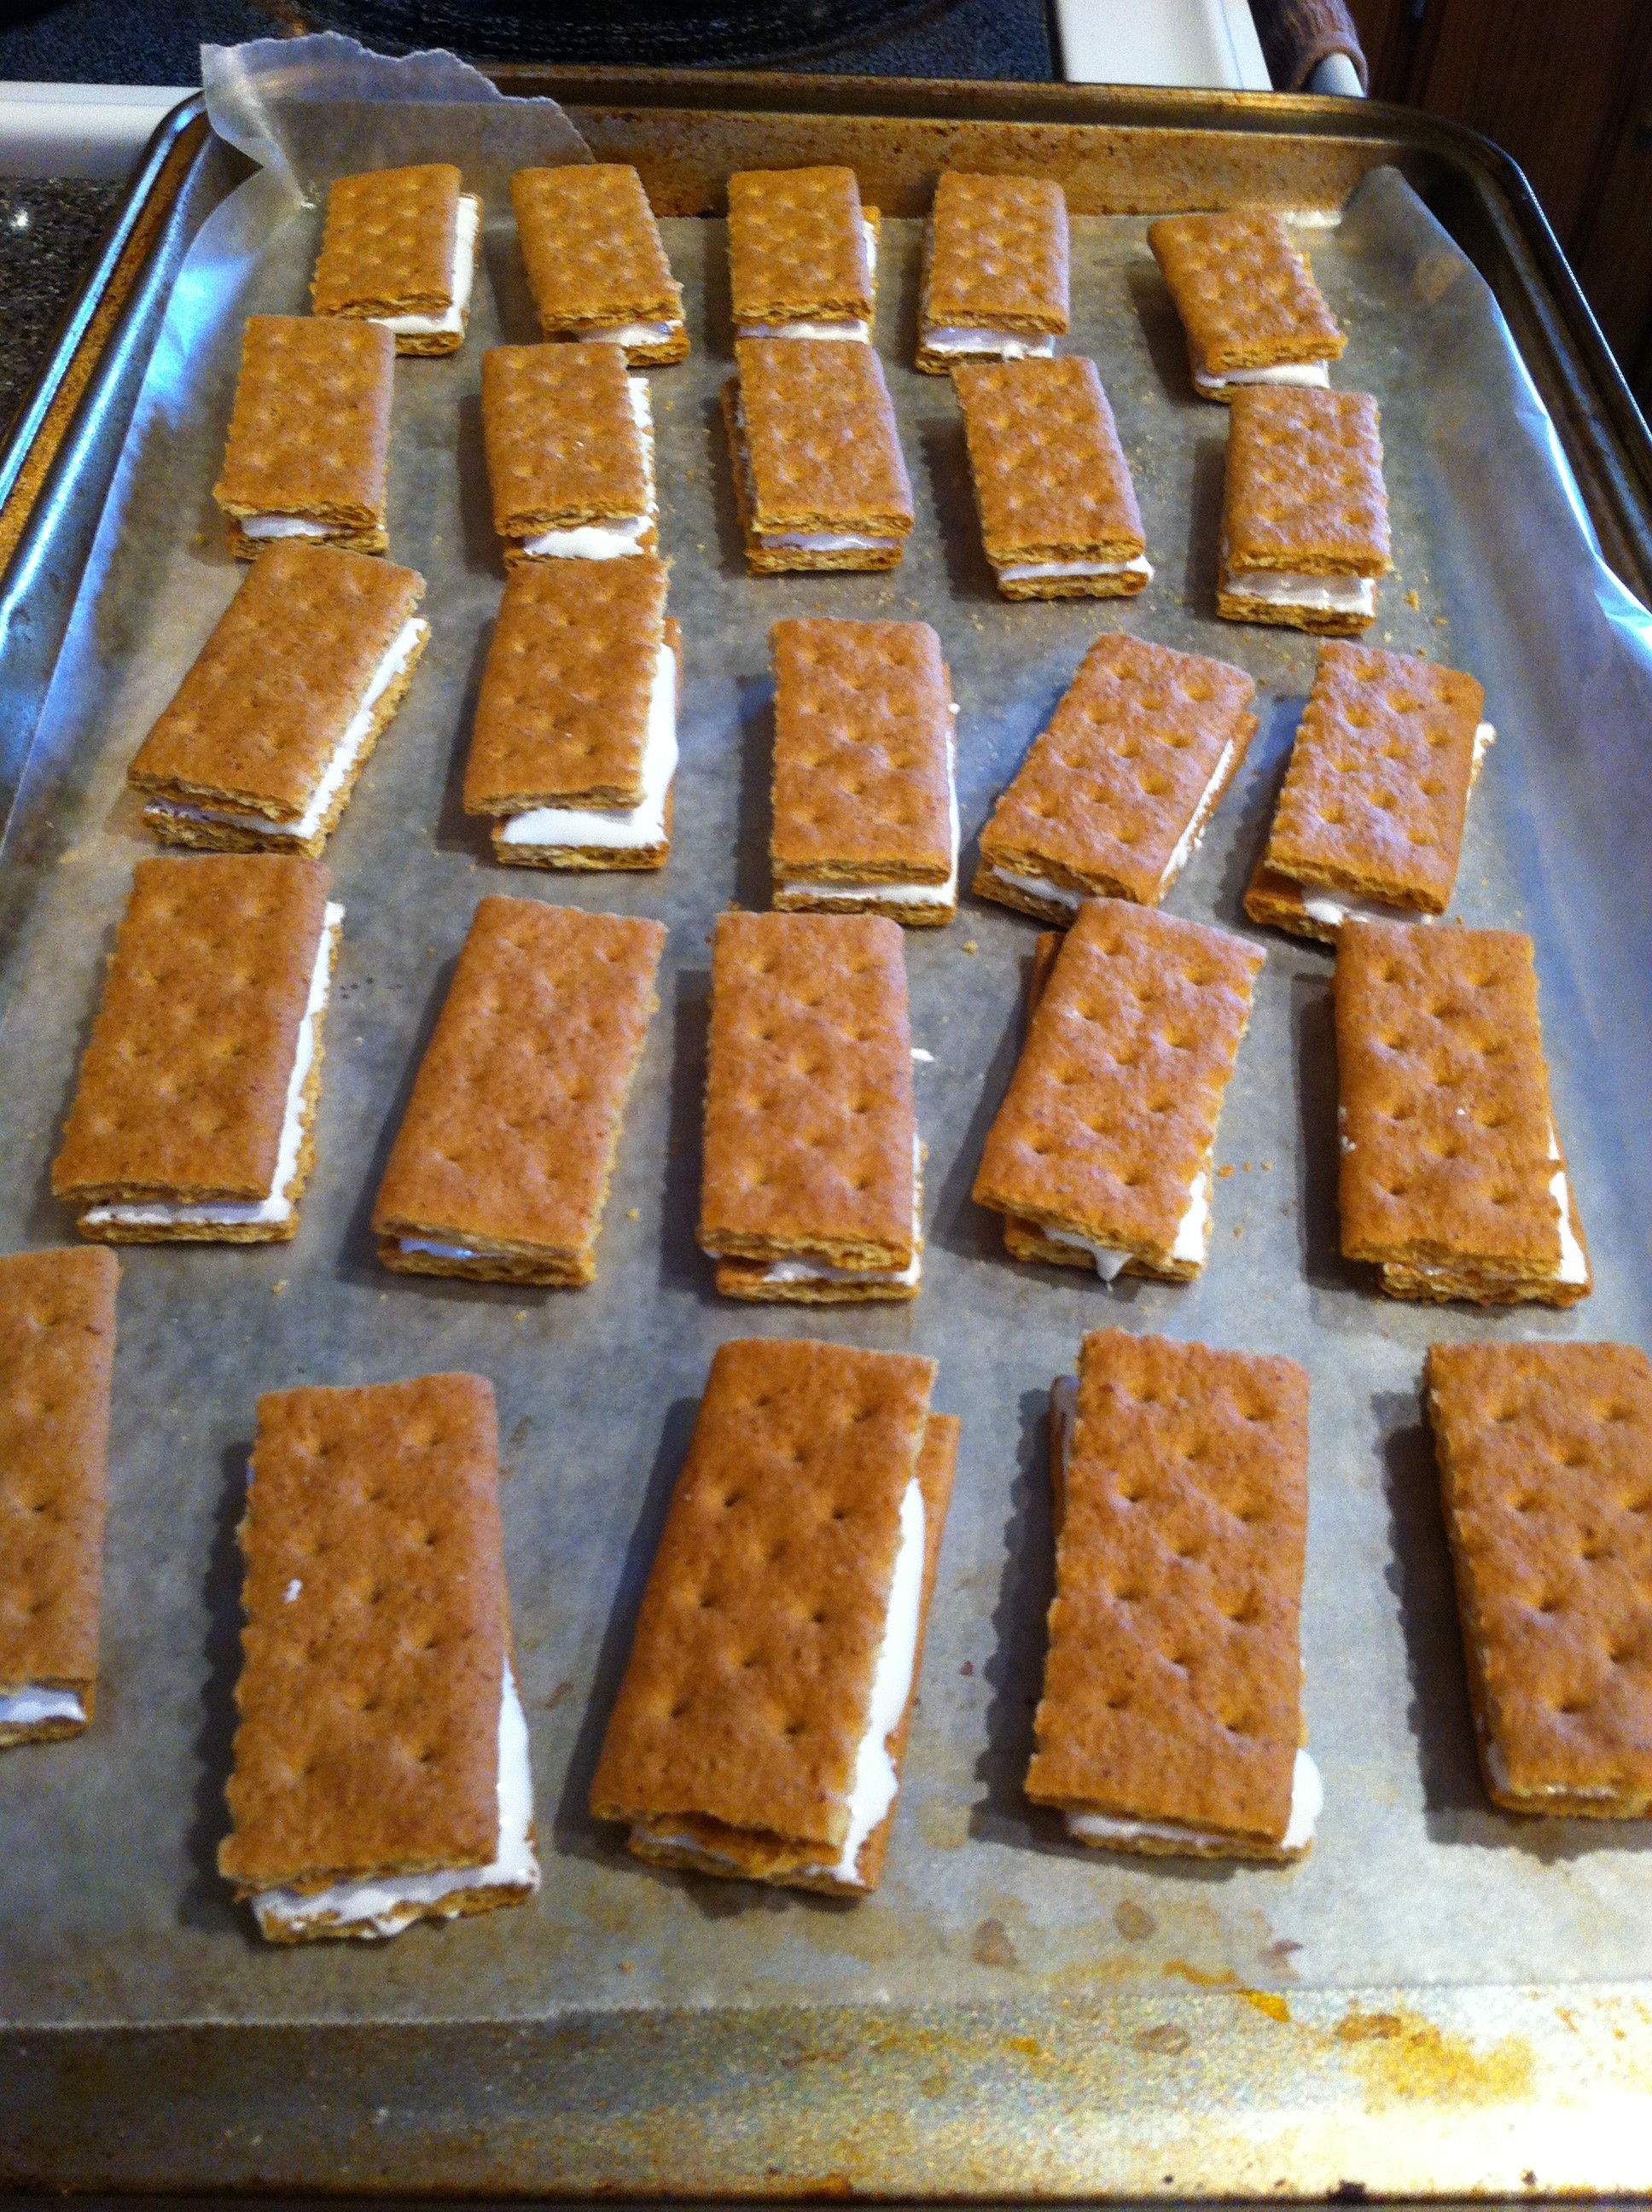
1. Take the graham crackers and break them into quarters.
2. Using a knife or spatula, spread about a tablespoon of the marshmallow fluff/creme onto one graham cracker. Set aside on a cookie sheet lined with wax paper.
Graham Crackers and Marshmallow Fluff
3. Top with another graham cracker quarter. The fluff was a little runny, so we put them in the freezer for about 10 minutes.
4. Melt your chocolate. We used about 3/4 of a bag of Toll House’s milk chocolate chocolate chips. They melted fairly quickly, and were ready when we pulled the graham crackers out of the freezer, but you could use whatever chocolate you prefer. We used our “double boiler” set up, a metal mixing bowl over a pot of boiling water.
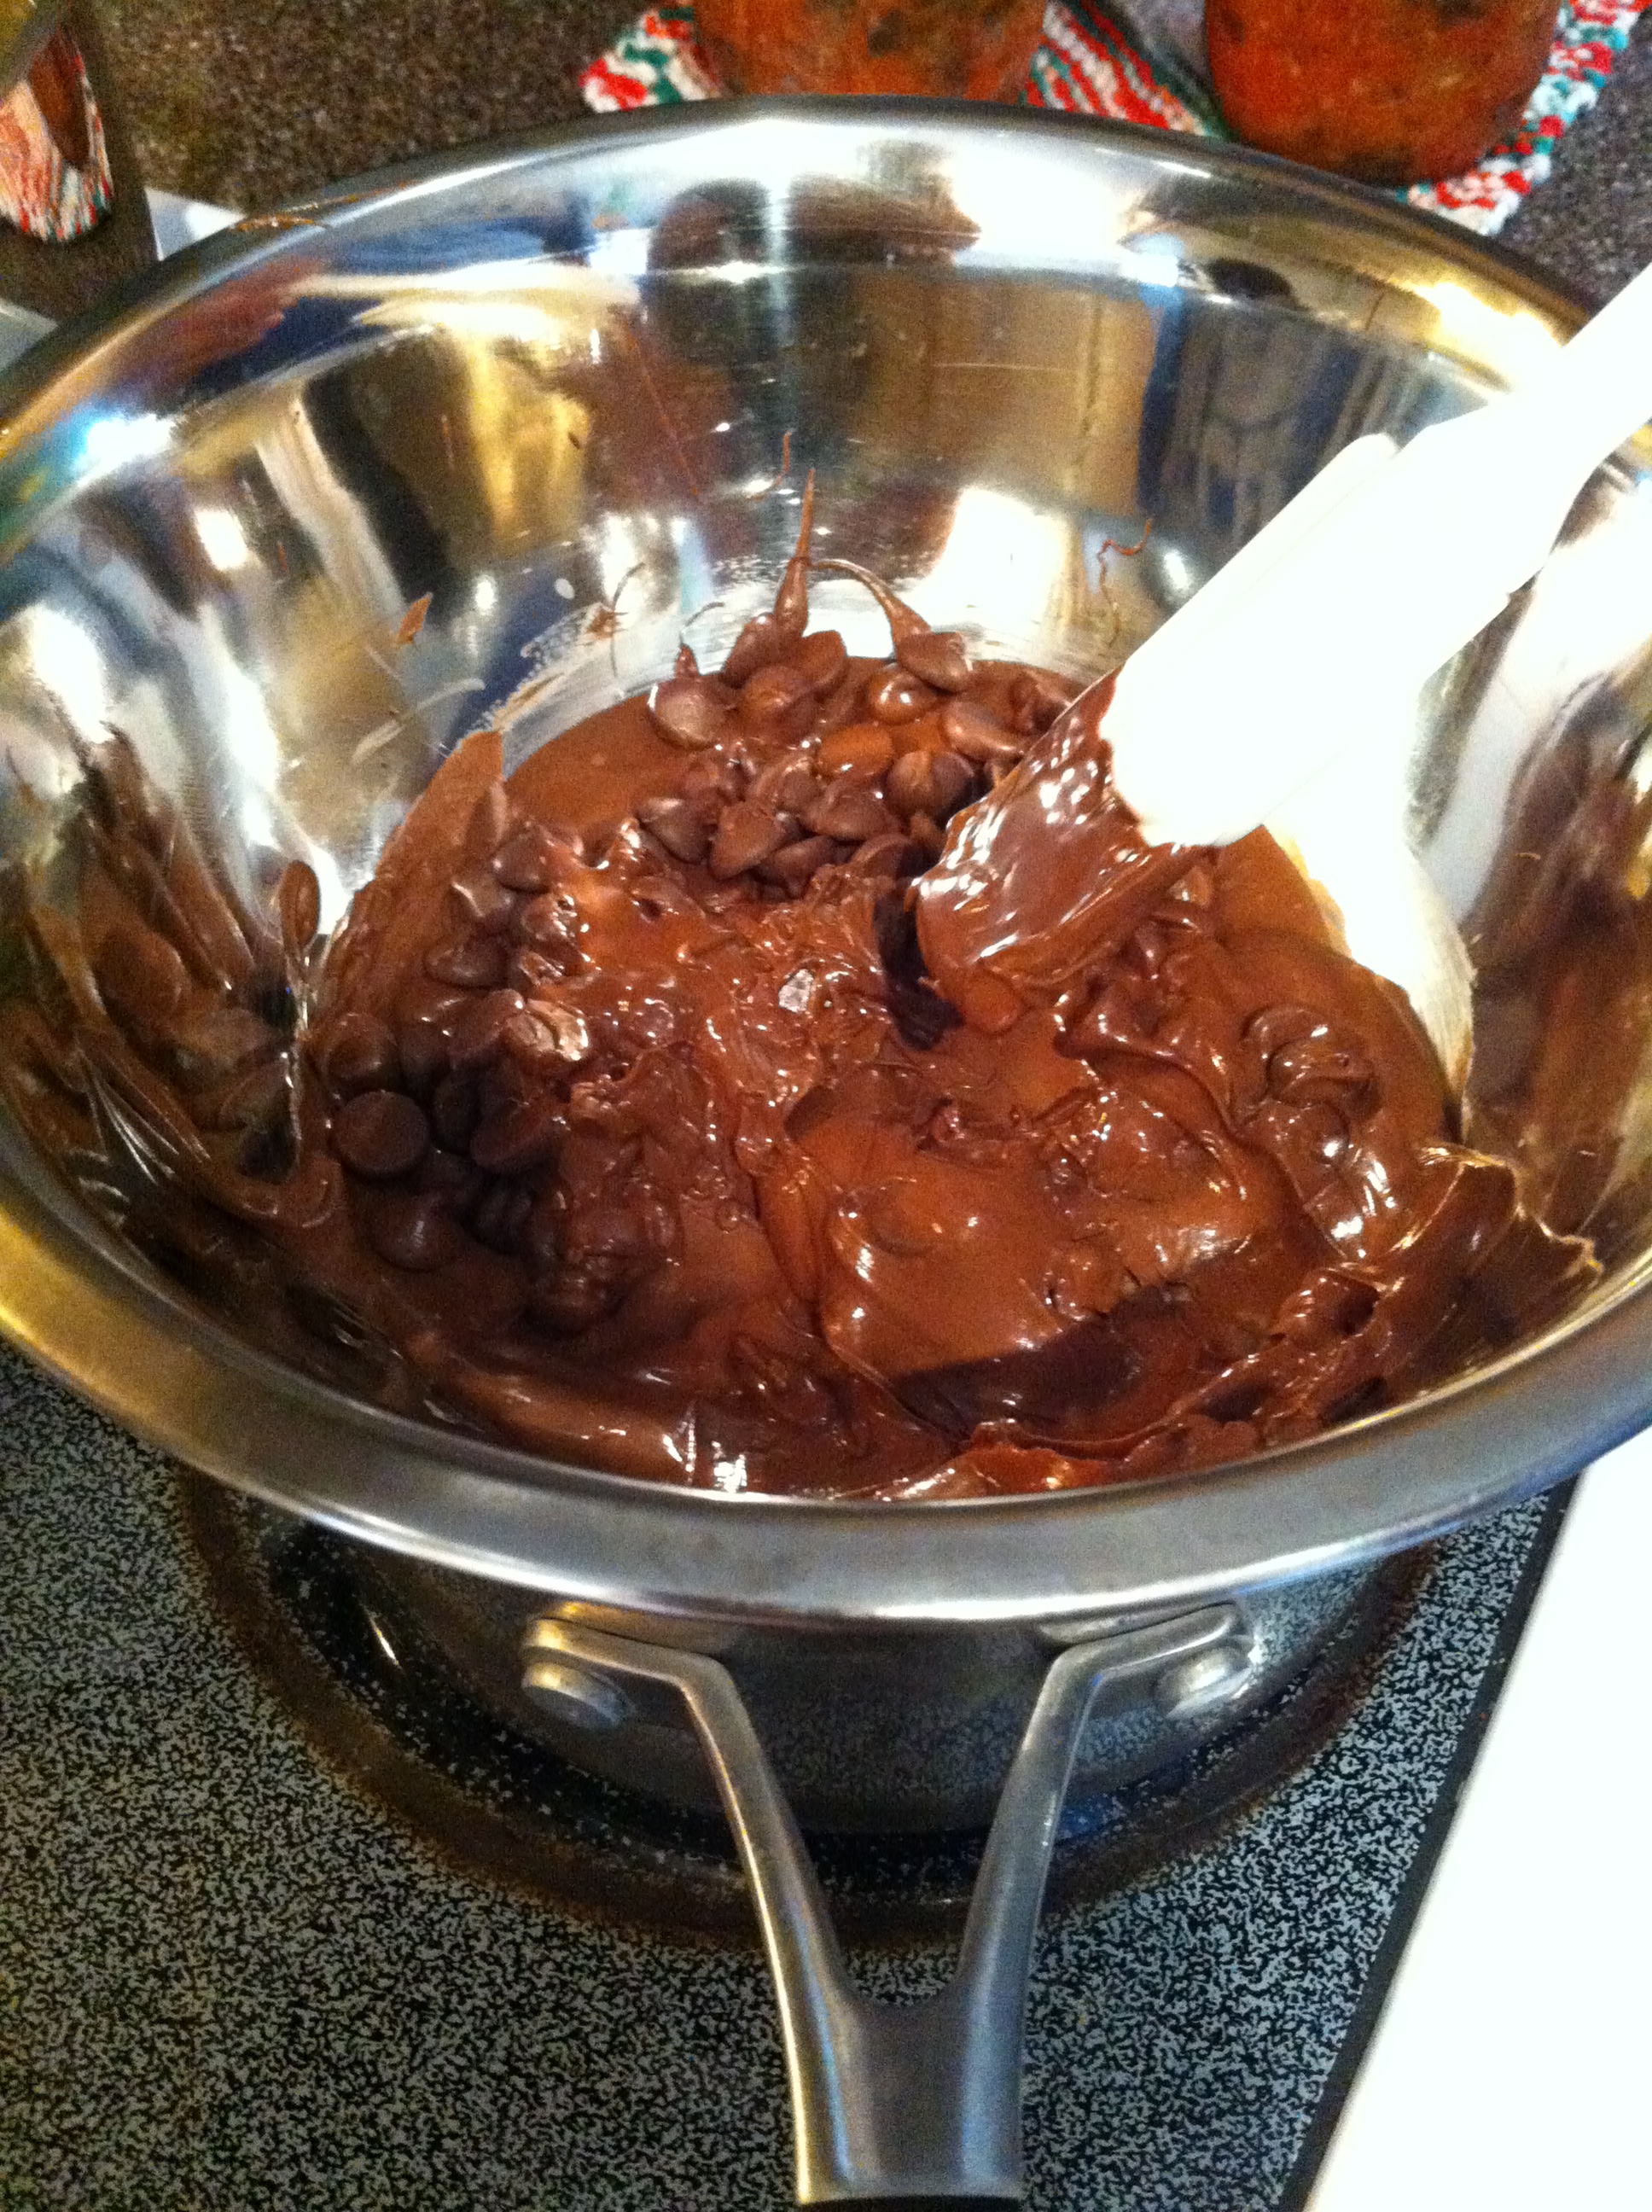
Melting the Chocolate
5. Dip half to 3/4 of the graham crackers in the melted chocolate. Leave some plain graham cracker so it’s easier for people to pick them up and eat! The bowl was deep enough that it worked out easily for us to just dip the s’more and put it right back on the cookie sheet. The trick to this step is to dip as quickly as possible. The heat from the chocolate will start to soften the marshmallow fluff, and we didn’t want it dripping into the chocolate.
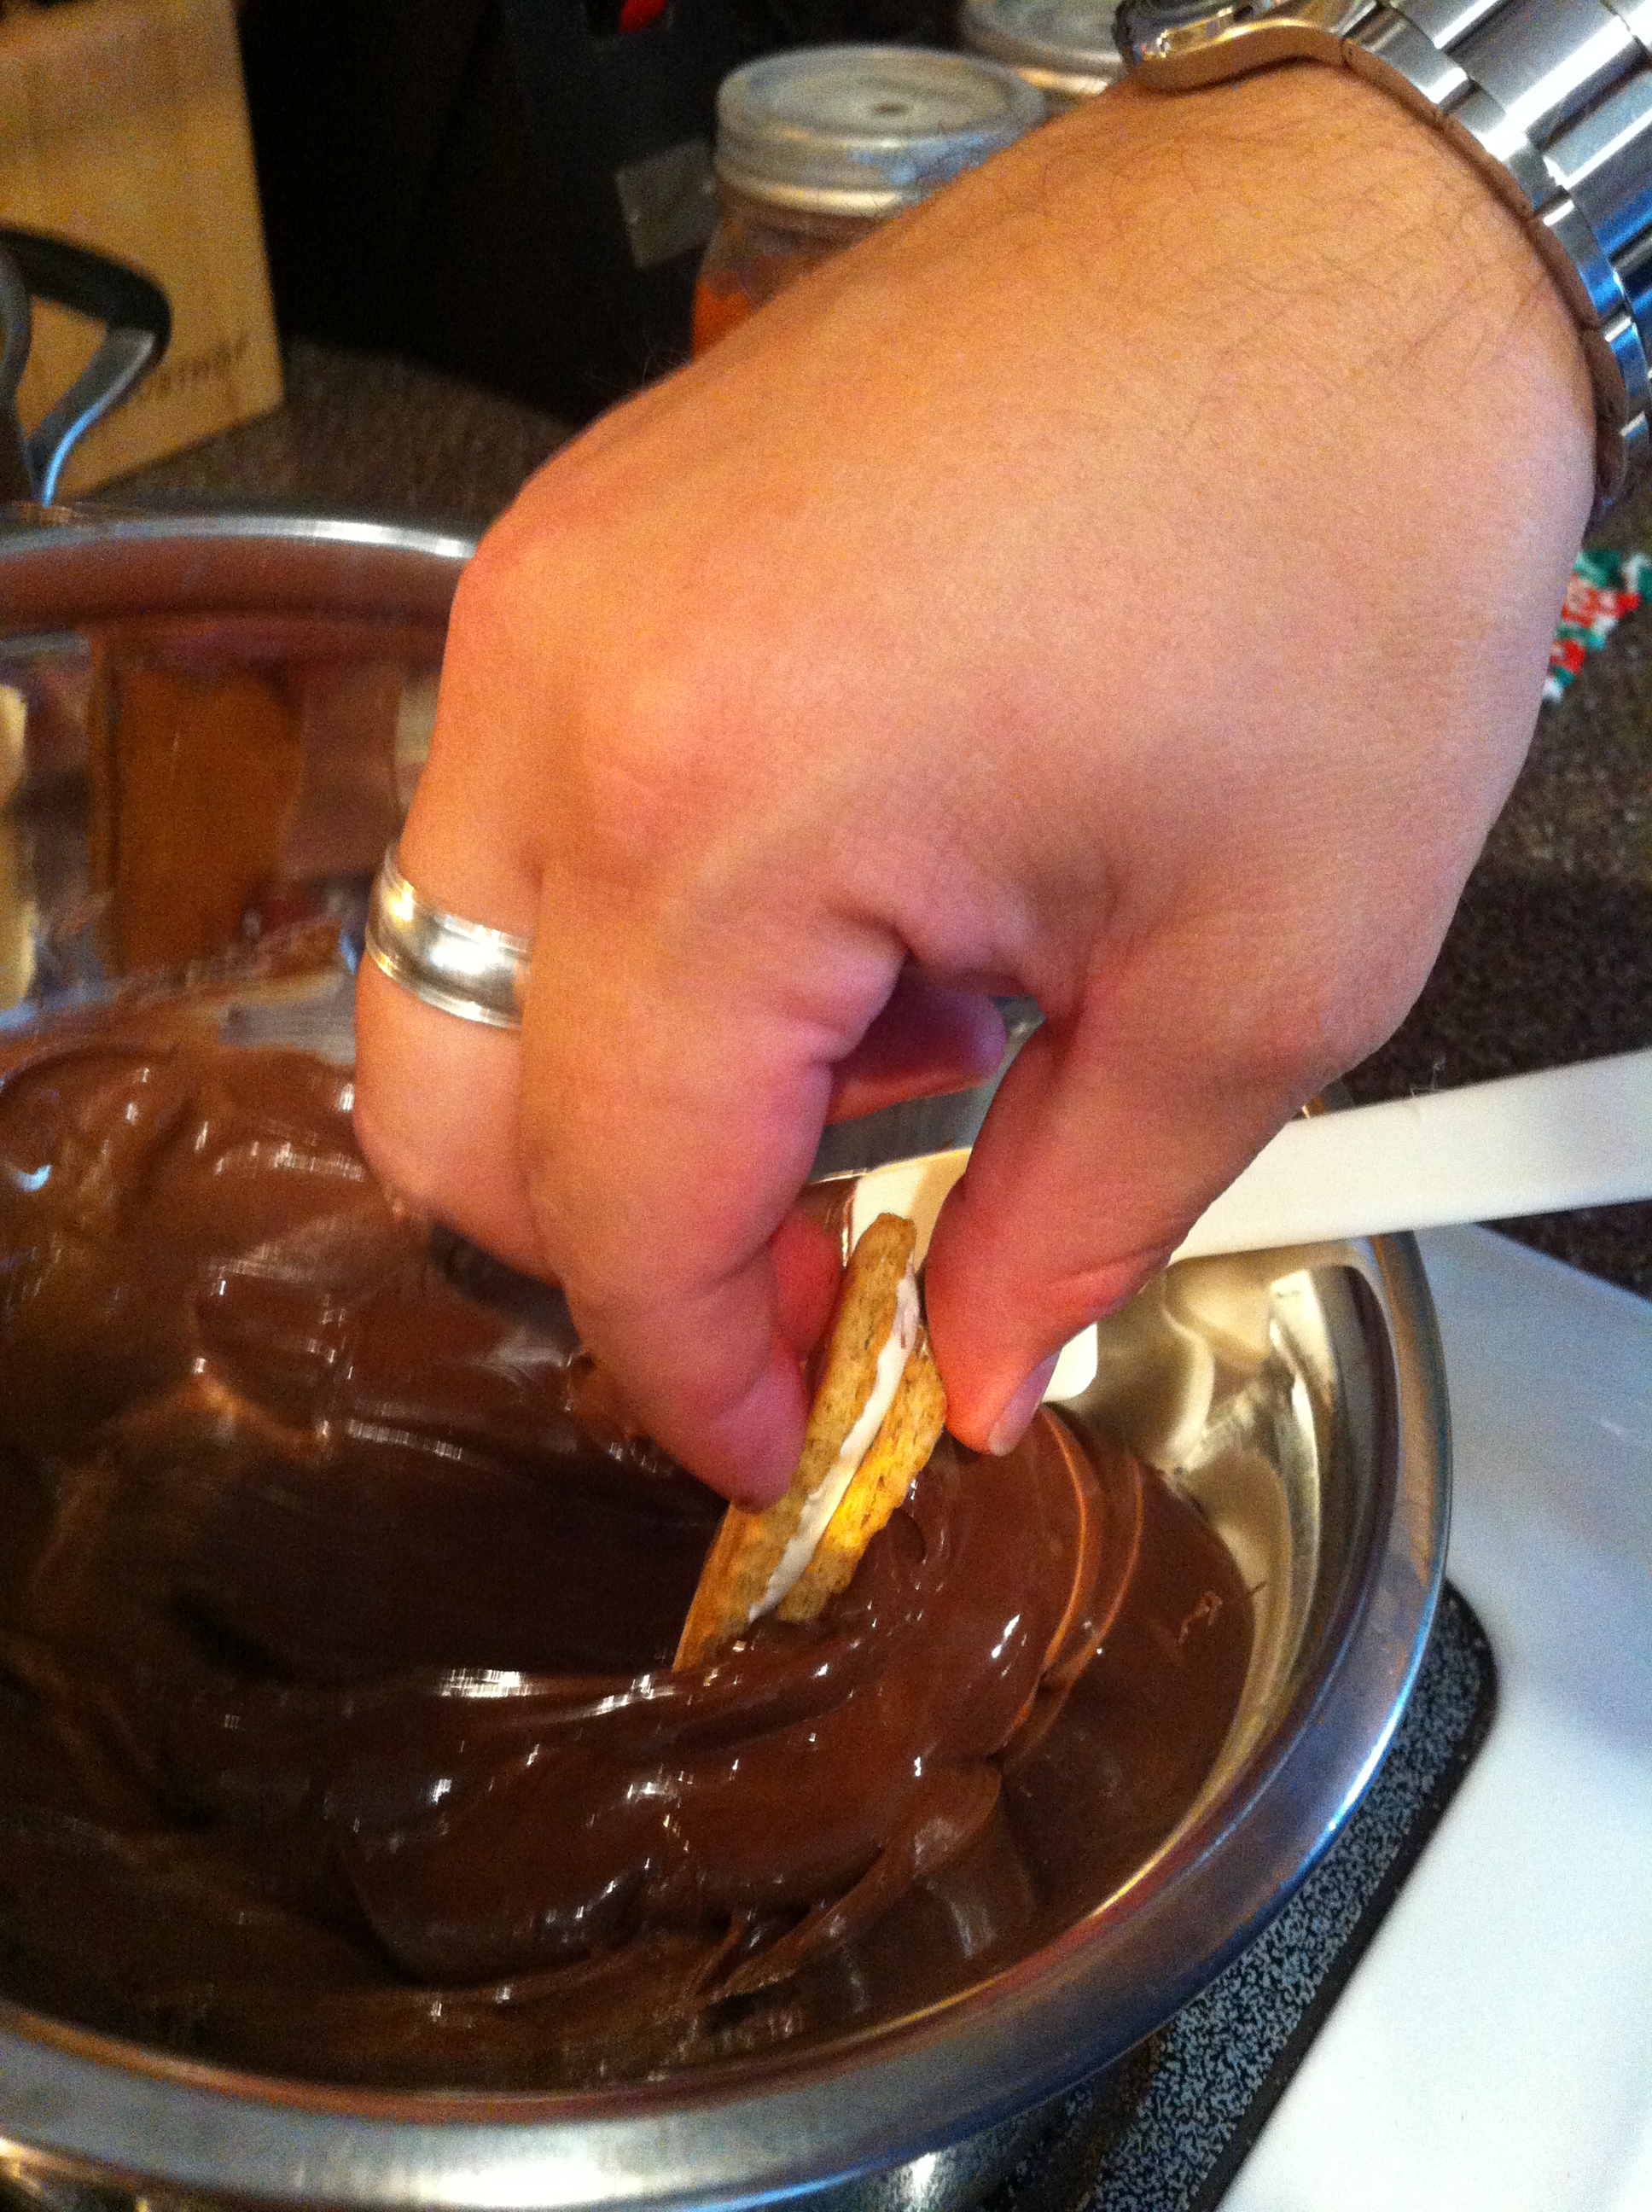
Dipping the s’more!
6. Sprinkle your desired topping onto the chocolate. (Totally optional!) We were hosting a game night and wanted to be festive. Do this while the chocolate is still soft so the topping sticks.
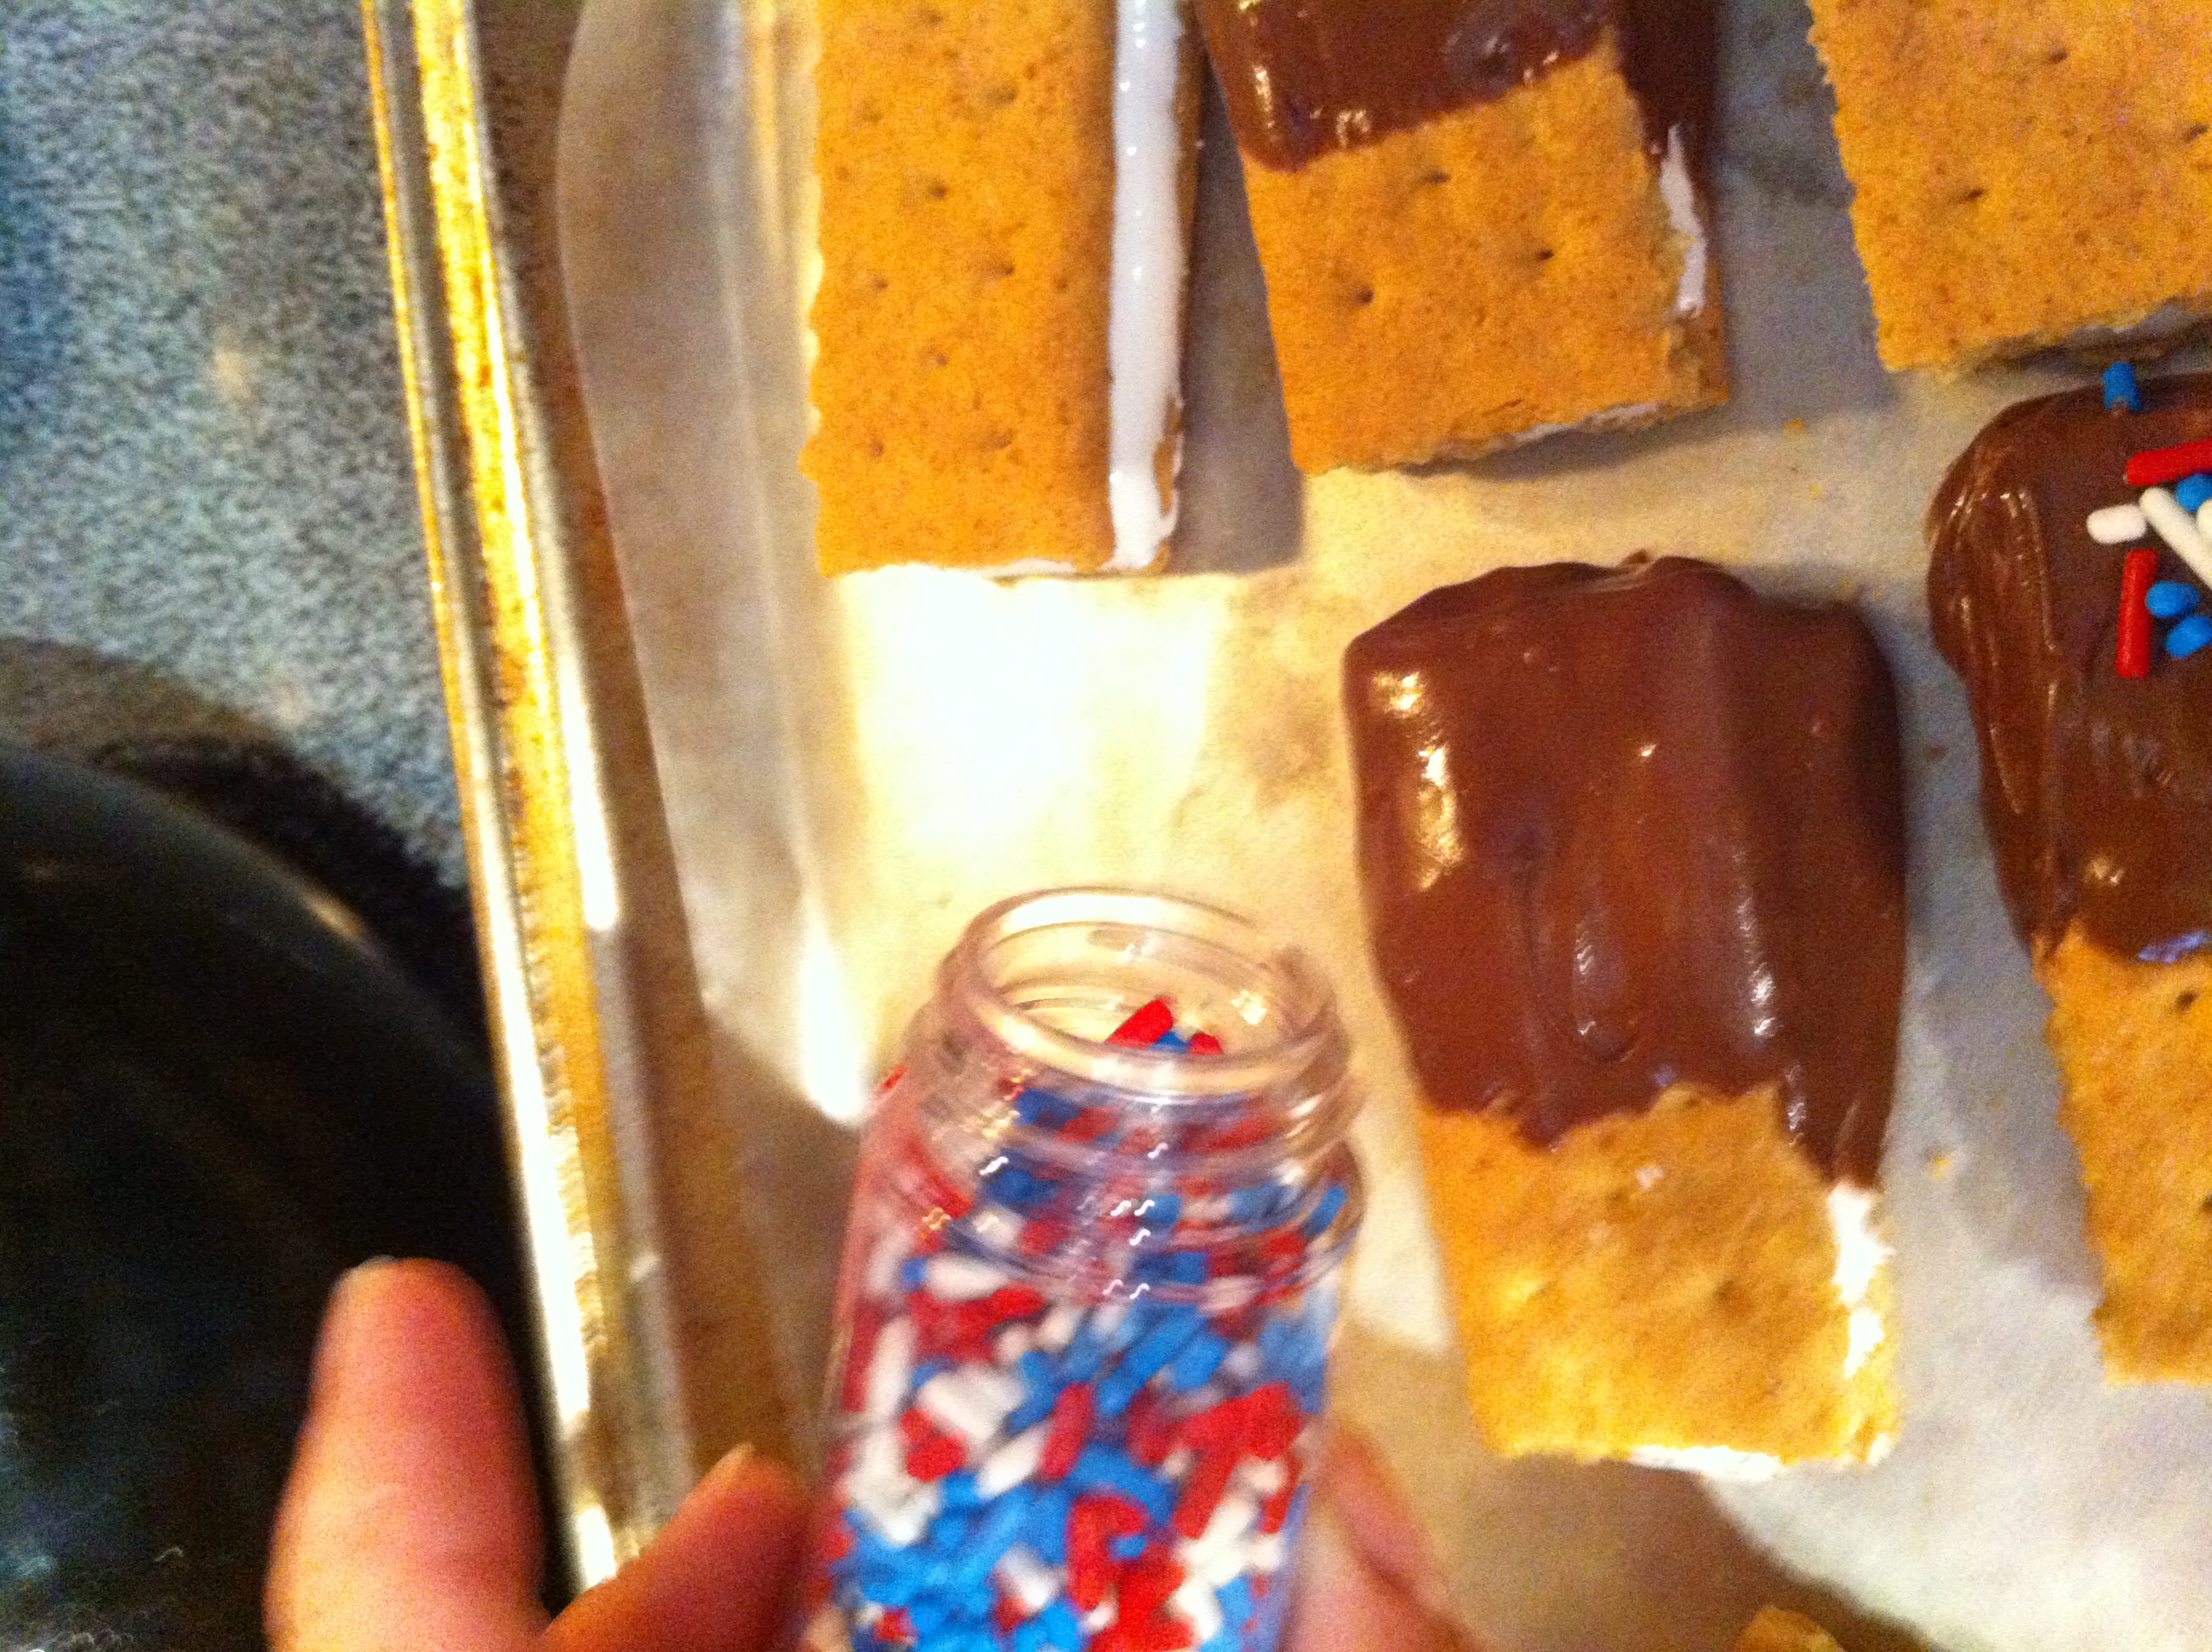
Adding the sprinkles to the s’mores
7. Put the cookie sheet back into the freezer for about 10 minutes. This will help the chocolate harden and the marshmallow re-harden if it started to melt.
8. Enjoy! Everyone at game night LOVED them and by the end of the evening they were all gone. If you do have any leftovers, I would suggest storing them in the fridge, the marshmallow fluff started to run again as they sat out during the evening.
I might have to make some more of these soon to re-live our camping weekend!
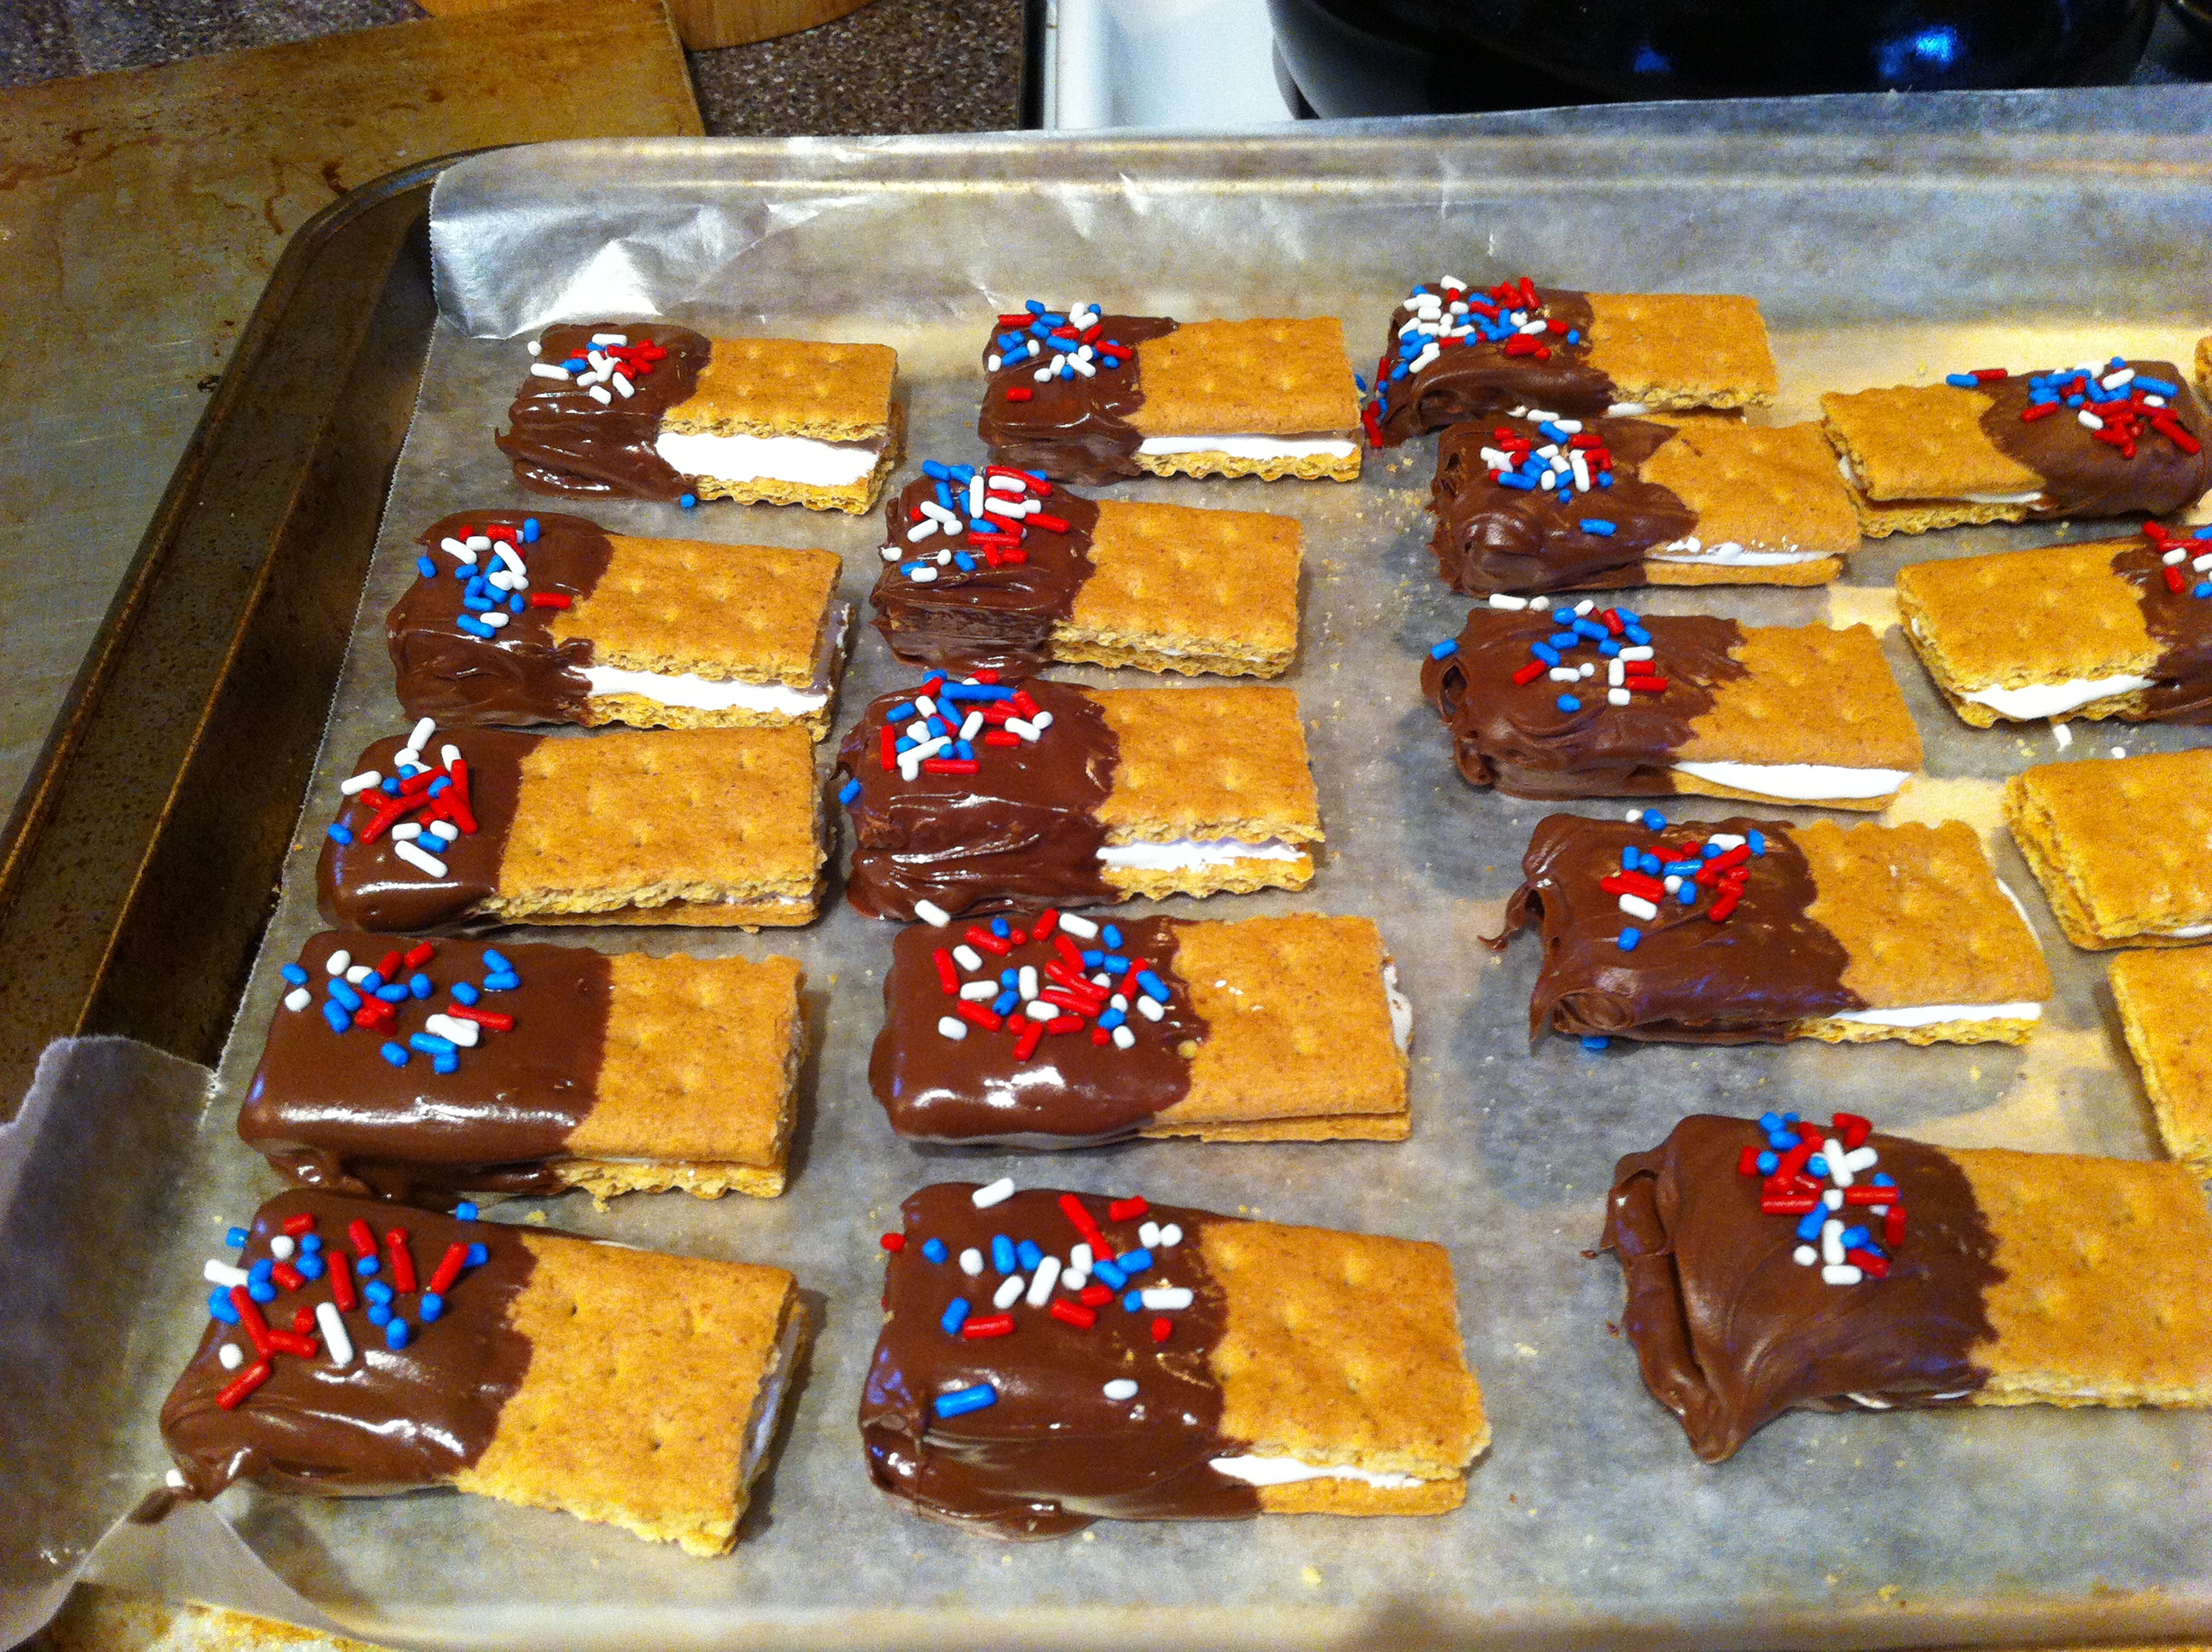
Finished S’mores